Table of Contents
Microsoft Azure Cloud Storage
Last updated on May 15, 2023
Azure is a cloud services operating system that serves as the development, service hosting, and service management environment for the Microsoft cloud platform. Azure provides developers with on-demand compute and storage to host, scale, and manage Web applications on the Internet through Microsoft data centers.
Availability:
- The Azure Blob Storage provider is not available for Nasuni Access Anywhere.
Azure Blob Storage
Locating Access Key
Log into the Microsoft Azure Portal. Navigate to Storage Accounts and choose a storage account to use. Or you can add a new storage account from this page.
From within a storage account, the credentials can be found under Settings > Access Keys.

From this page you will need the:
- Storage account name and
- key1 Key or key2 Key
Alternative: Shared Access Signature
New in version 2006
Instead of using a key, you can also generate and use a Shared Access Signature (SAS).
From the storage account page, under Settings select Shared access signature.
Select desired permissions and expiration and generate the SAS token. It will look something like this:
?sv=2019-12-12&ss=b&srt=sco&sp=rwdlacx&se=2020-12-30T02:59:34Z&st=2020-12-08T18:59:34Z&spr=https,http&sig=Yvmo4EIyd8UWzEkRlgtD3v2SUL
Use this SAS token when adding the provider. You may also update the SAS after configuring the storage the same way you can update the password, from the provider settings.
Adding Azure Blob Storage
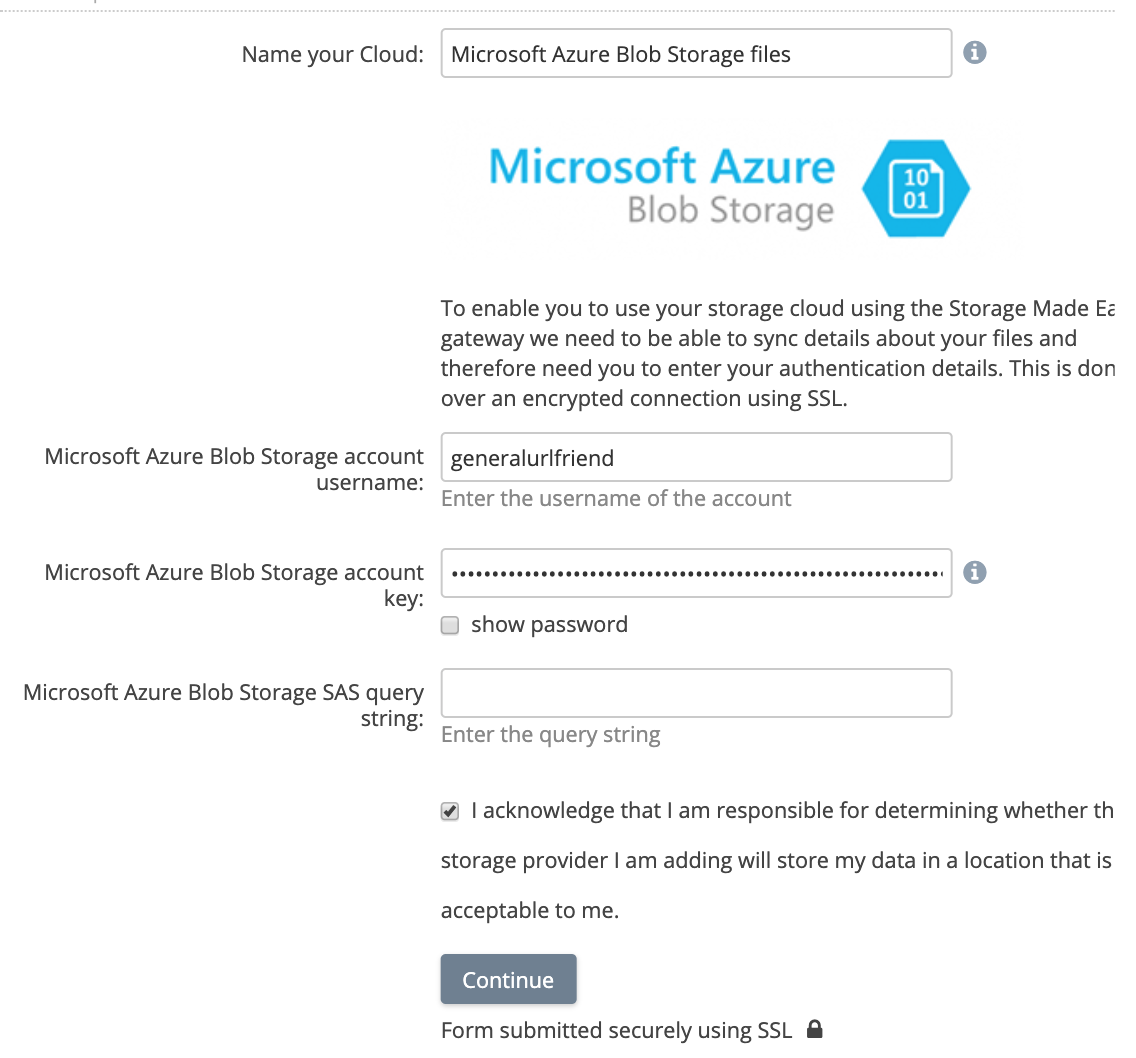
Enter only a storage account name and key at the first step of the wizard.
Alternatively, enter a storage account name and an SAS token as the SAS query string.
Selecting containers
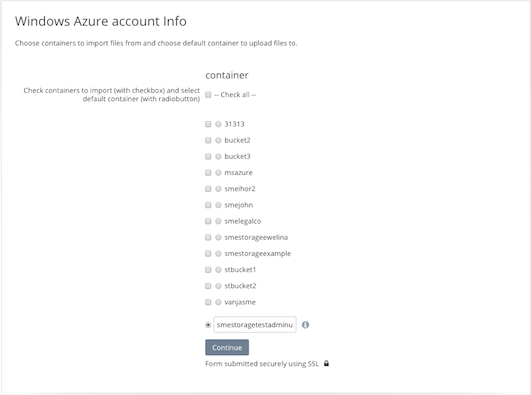
After you enter your authentication details you will be taken to a screen where you can choose which containers you wish to add to your Account. You will also need to choose the default container where uploads will be stored by default.
Syncing your Metadata
After your authentication has been verified you will be required to sync your metadata to create your cloud view within Access Anywhere.
Enabling containers post install
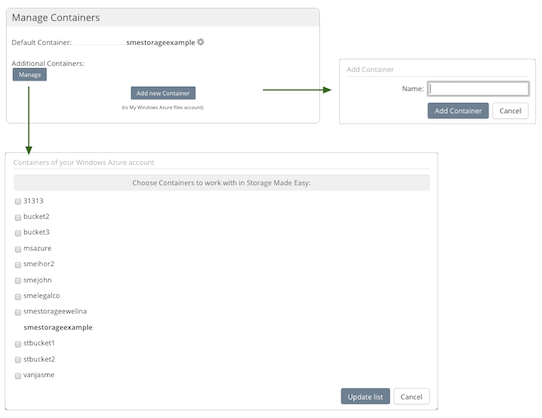
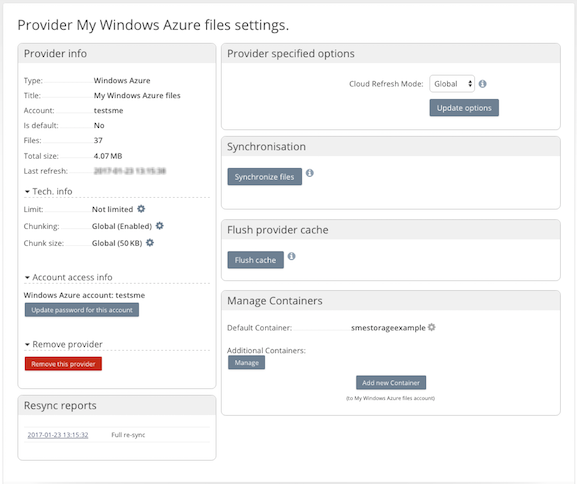
If you add containers later to your Blob Storage Account you can go the provider setting page (My Account→Providers→Azure Settings) for your Azure Cloud Storage. From here you can update your containers or add new containers.
Azure Settings
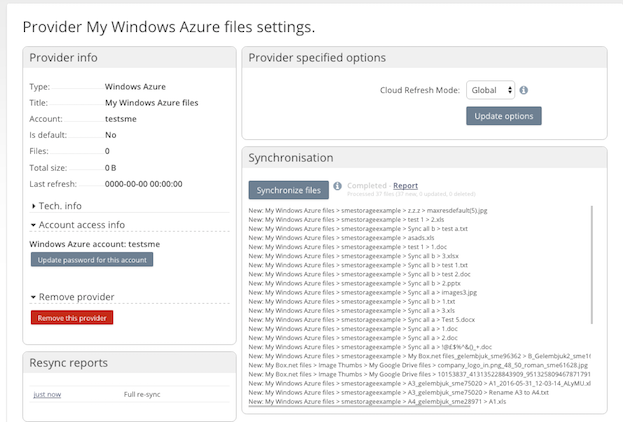
You can access the Windows Azure settings after login from the web by clicking on My Account from the sidebar and choosing the Providers tab and then the Azure Cloud Settings link.
From here you can:
Refresh your Cloud Files view: Useful if you added files to Azure from outside of Access Anywhere. This will resync the file meta information and the files will then be visible in your account.
Master Source: Unless you have a reason to, you should leave this as the default. Setting Azure to be the master will mean that no matter what you do with your data within Access Anywhere (in terms of moving it around) on the next resync the Azure view will be re-created for your files.
Chunking: Chunking enables you to breakdown files into smaller chunks on upload. You should only use these settings if your Cloud Provider limits the files size on upload. The maximum file upload size for a single file on Azure is 4GB.
Password: If you change your Azure key information you will need to change it here also to enable Access Anywhere to access the Azure account.
Manage Buckets / Containers: This option enables you to change the default container. This is the default container that will be used for all uploads via Access Anywhere. You can also choose to add new containers that can be used in your account.
Add Bucket/Container: Enables you to add a new Azure Container
Remove this provider: Deletes the Azure provider from within Access Anywhere and removes all the meta-information. Your files on Azure are not affected.
Rate Limiting
Azure may limit the rate at which it processes requests. This page: Access Anywhere Handling of Rate-Limiting Storage Providers explains how Access Anywhere responds to rate limiting.
