Microsoft Entra ID
This document describes setting up integration with Microsoft Entra ID (formerly Azure Active Directory) with SAML 2.0. This involves:
- Creating an enterprise application from Microsoft Azure.
- Adding an Auth System to your Access Anywhere organization.
Create Azure Enterprise Application
As an administrative user, log into the Microsoft Azure portal: https://portal.azure.com/
Create Enterprise Application
Search and enter the page for "Enterprise Applications", Add a New Application. Click "Create your own application".
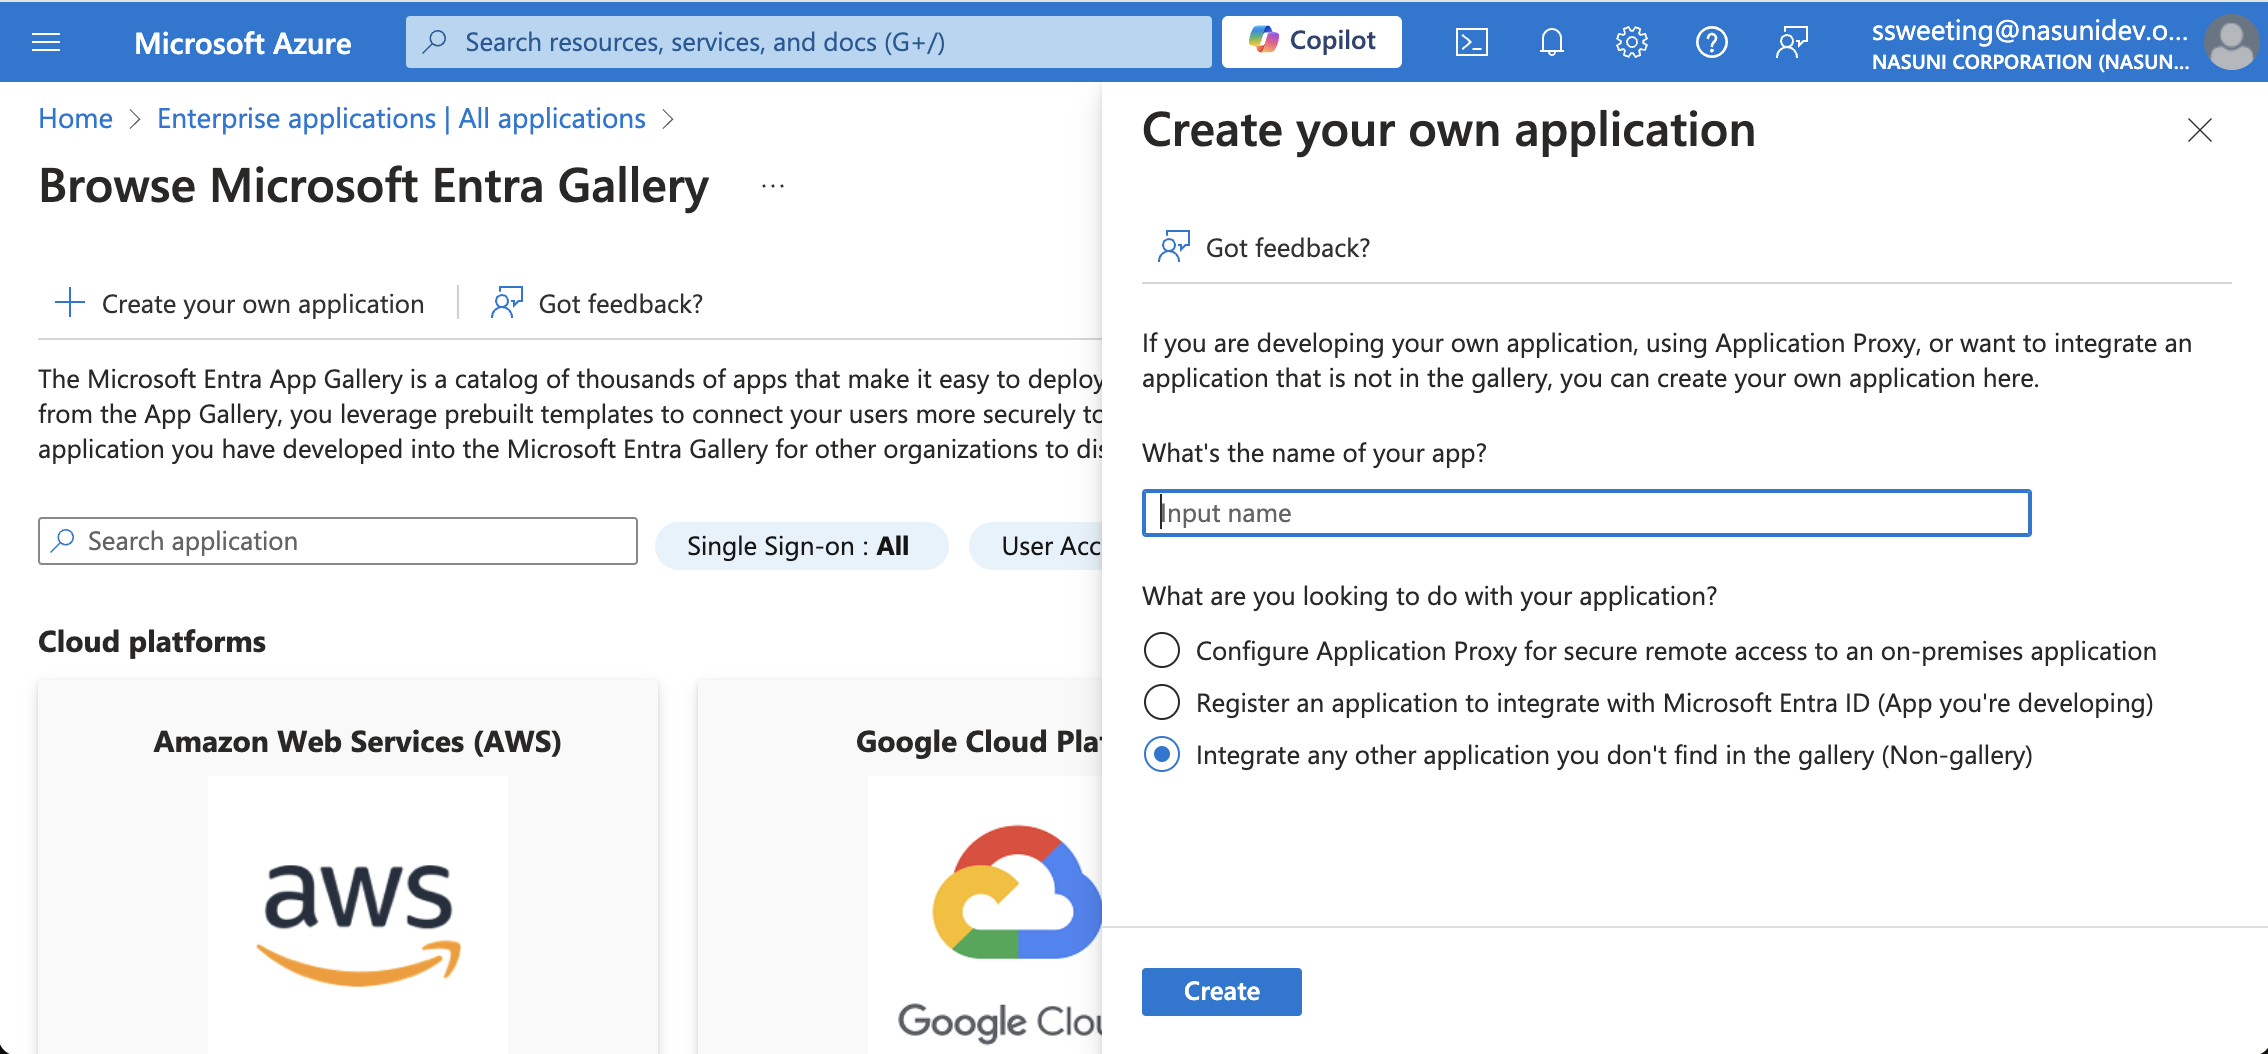
Input a name for the application, for example Nasuni Access Anywhere.
Select Integrate any other application you don't find in the gallery from the list of options.
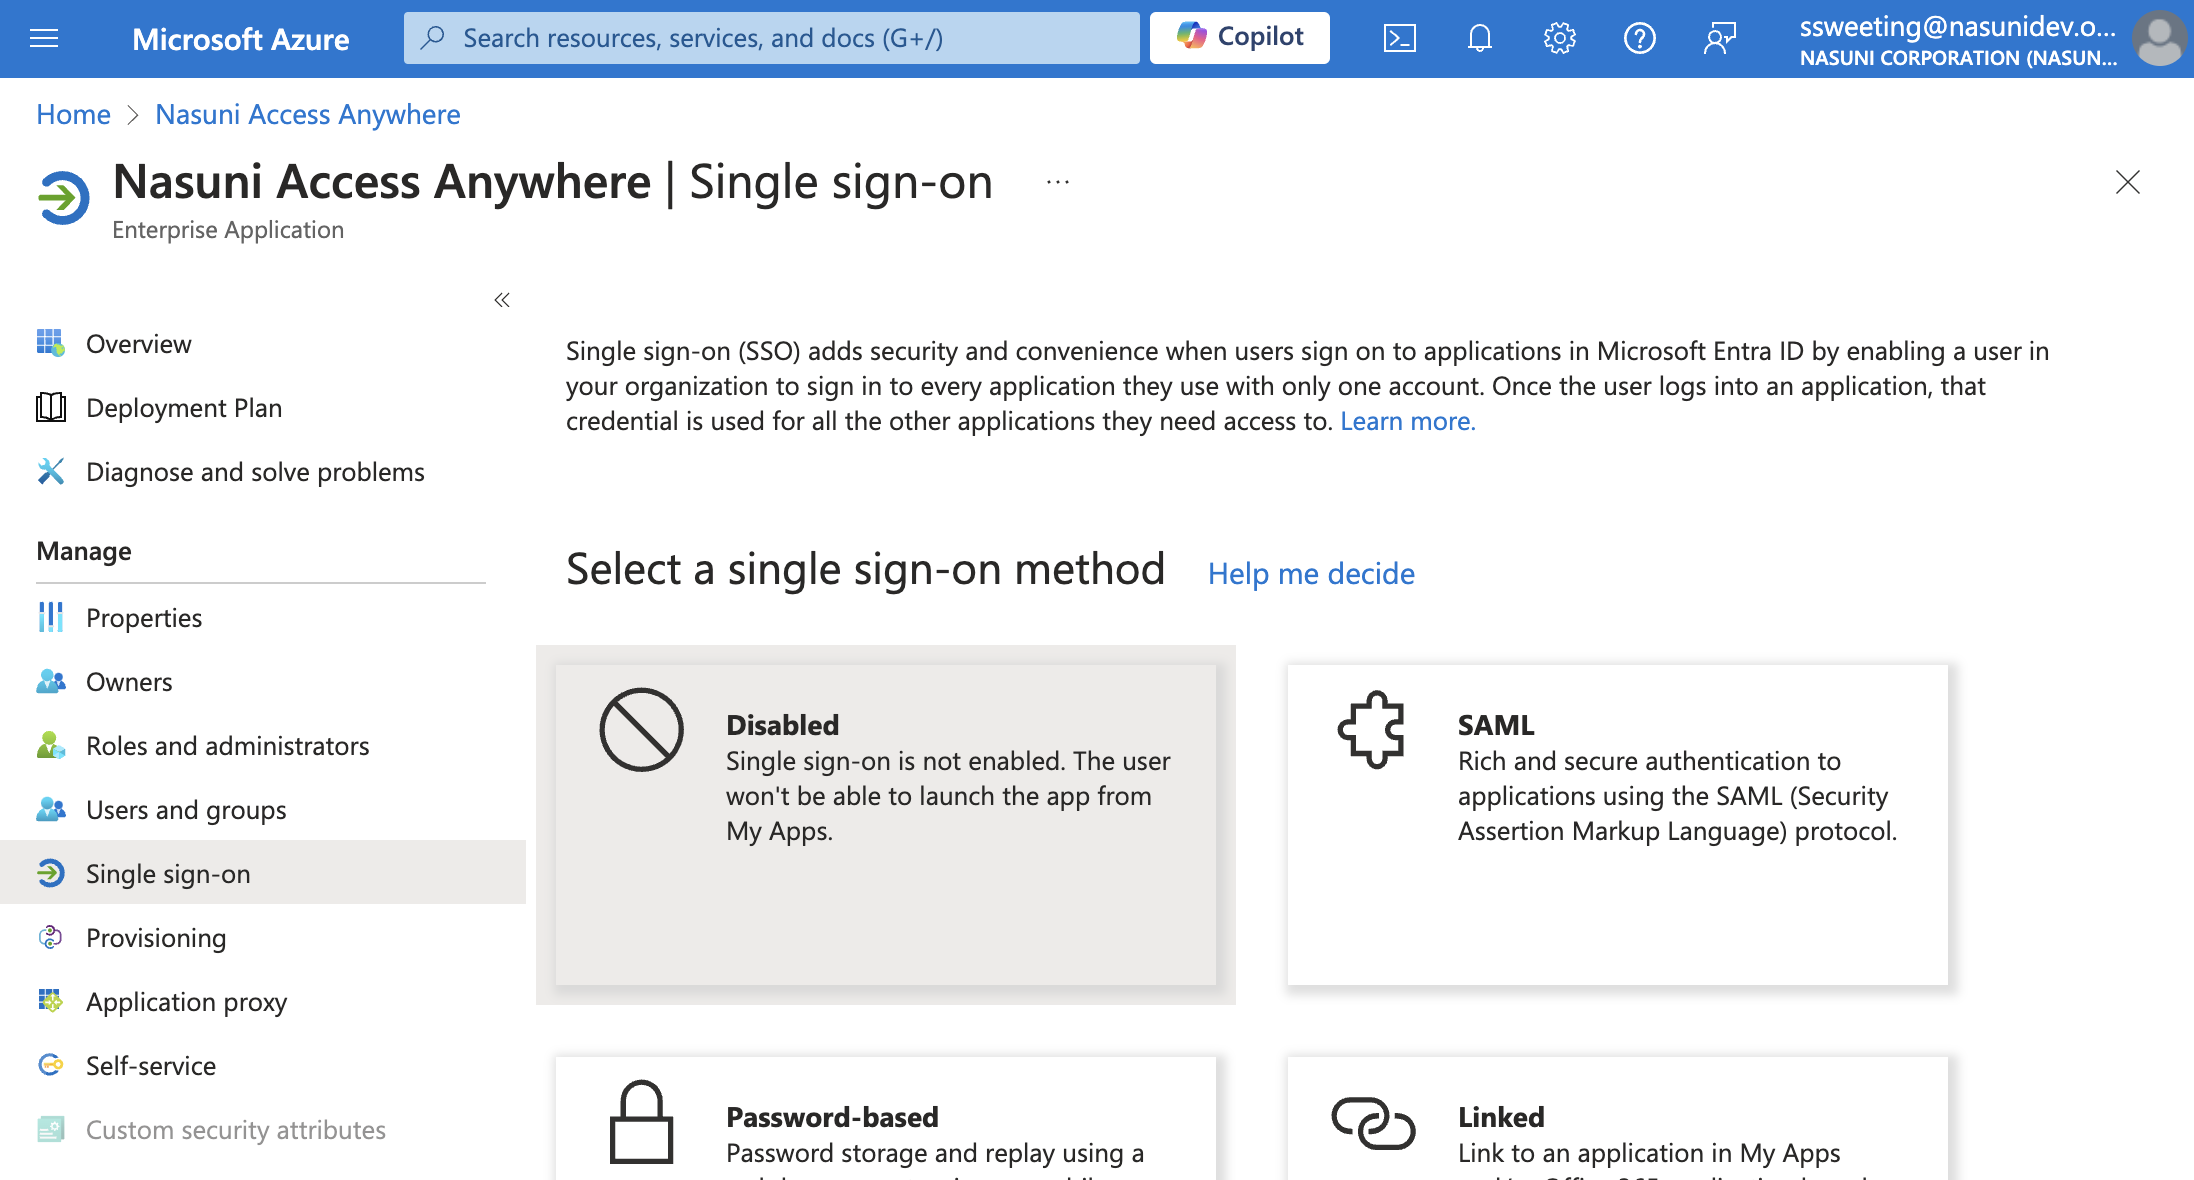
Now that the application is created, select SAML for single sign-on.
1. Basic SAML Configuration
In "Basic SAML Configuration" enter the following URLs for your Access Anywhere instance.
-
Identifier (Entity ID): Server URL - ex: https://files.example.com/
-
Reply URL (Assertion Consumer Service URL): ex: https://files.example.com/saml.htm
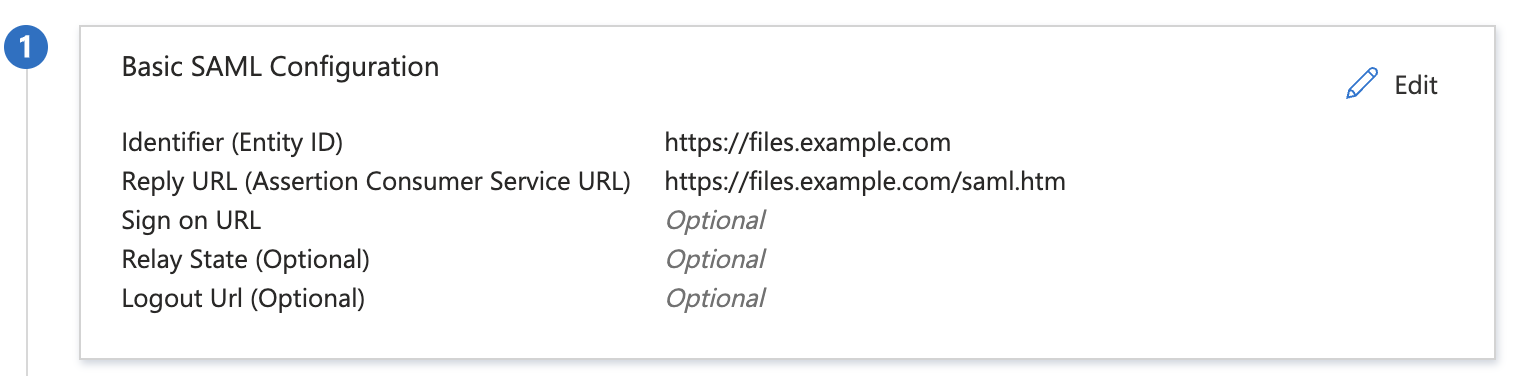
The other settings are not required.
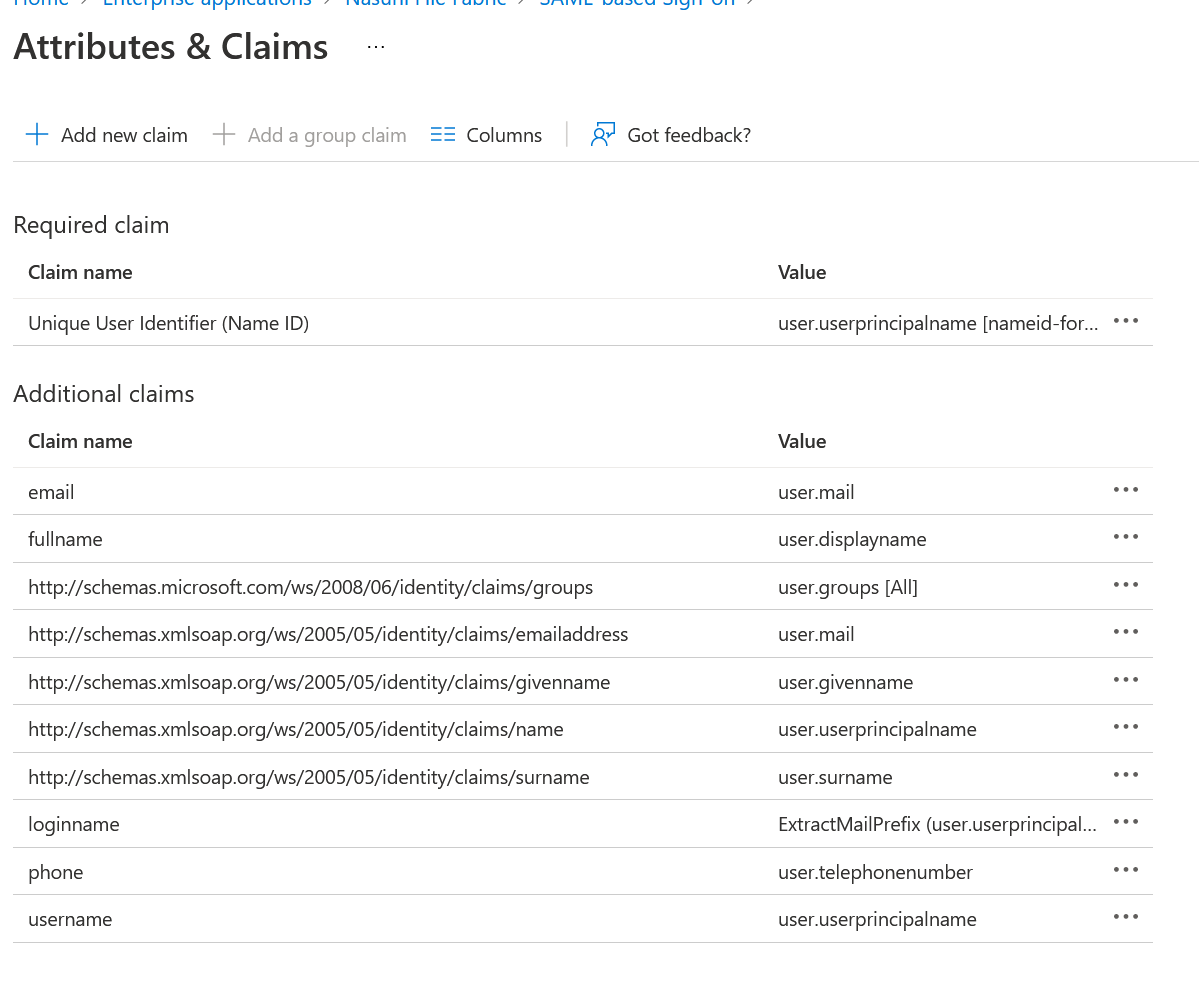
2. Attributes & Claims
Next we will set up two SAML claims.
Under Attributes & Claims click Edit.
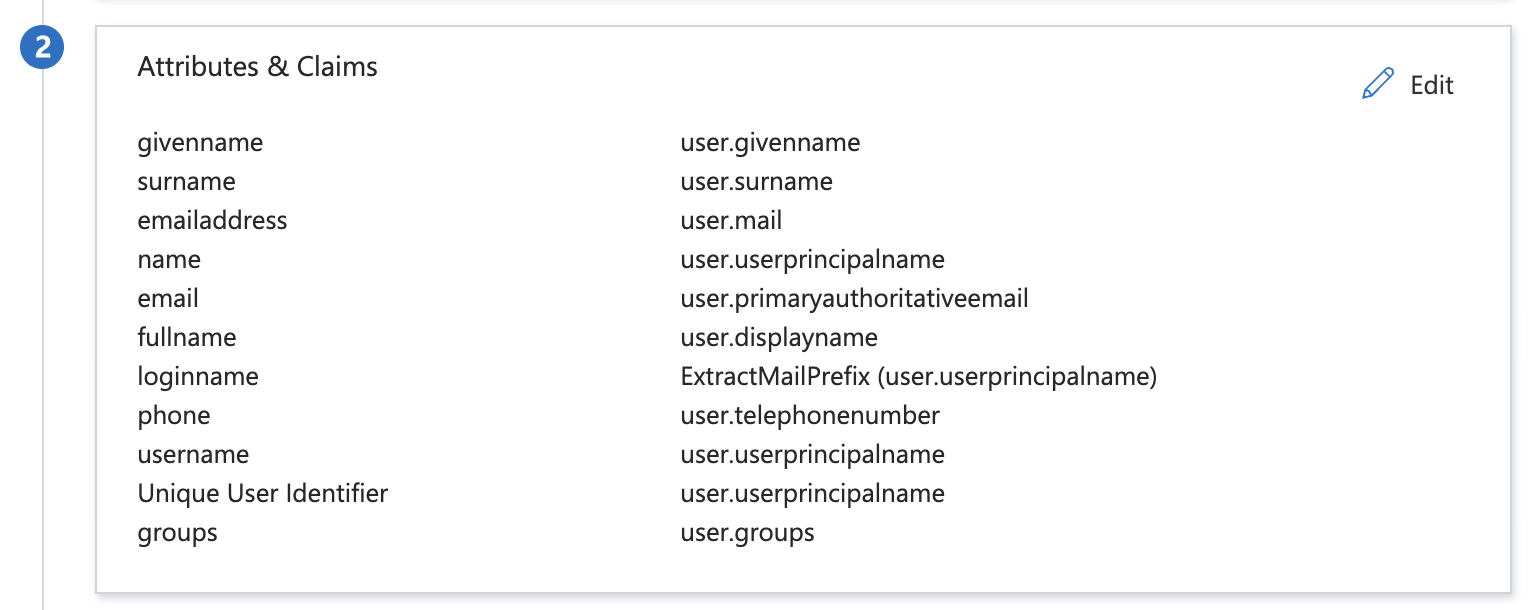
You will taken to the Attributes & Claims page.
Add Group Claim
Then select Add a group claim.
Select All Groups as which groups should be returned in the claim. Source Attribute should be set to Group ID.
Add Claim
In the "Attributes & Claims" section add a new claim and make sure all the claims below are entered:
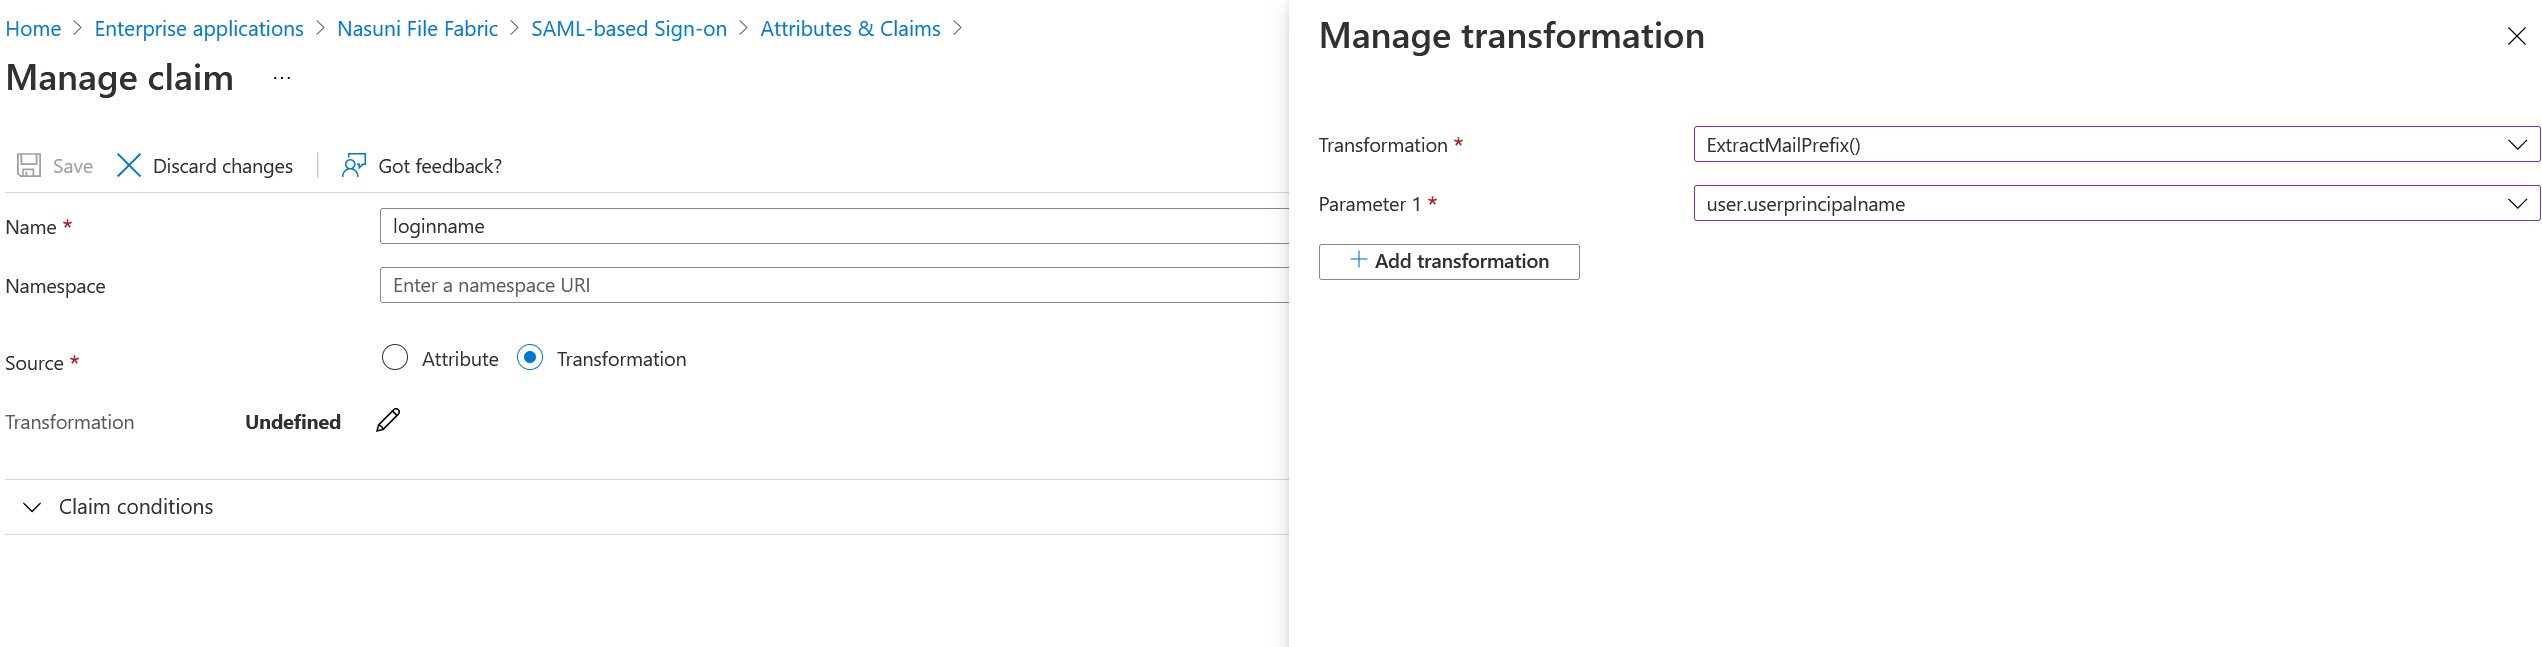
Please note, in order to get the correct UPN local part for the user we will need to create a transformation for one of those attributes, like so:
Transformation: ExtractMailPrefix()
Paramater 1: user.userprincipalname
If a user is a member of more than 150 groups, and you are importing these on login (not recommended when using Nasuni storage) the Entra SAML assertion returns a link to Microsoft's Graph API instead of a list of the groups. If this is a possibility see the end of this document for "Users with than 150 groups".
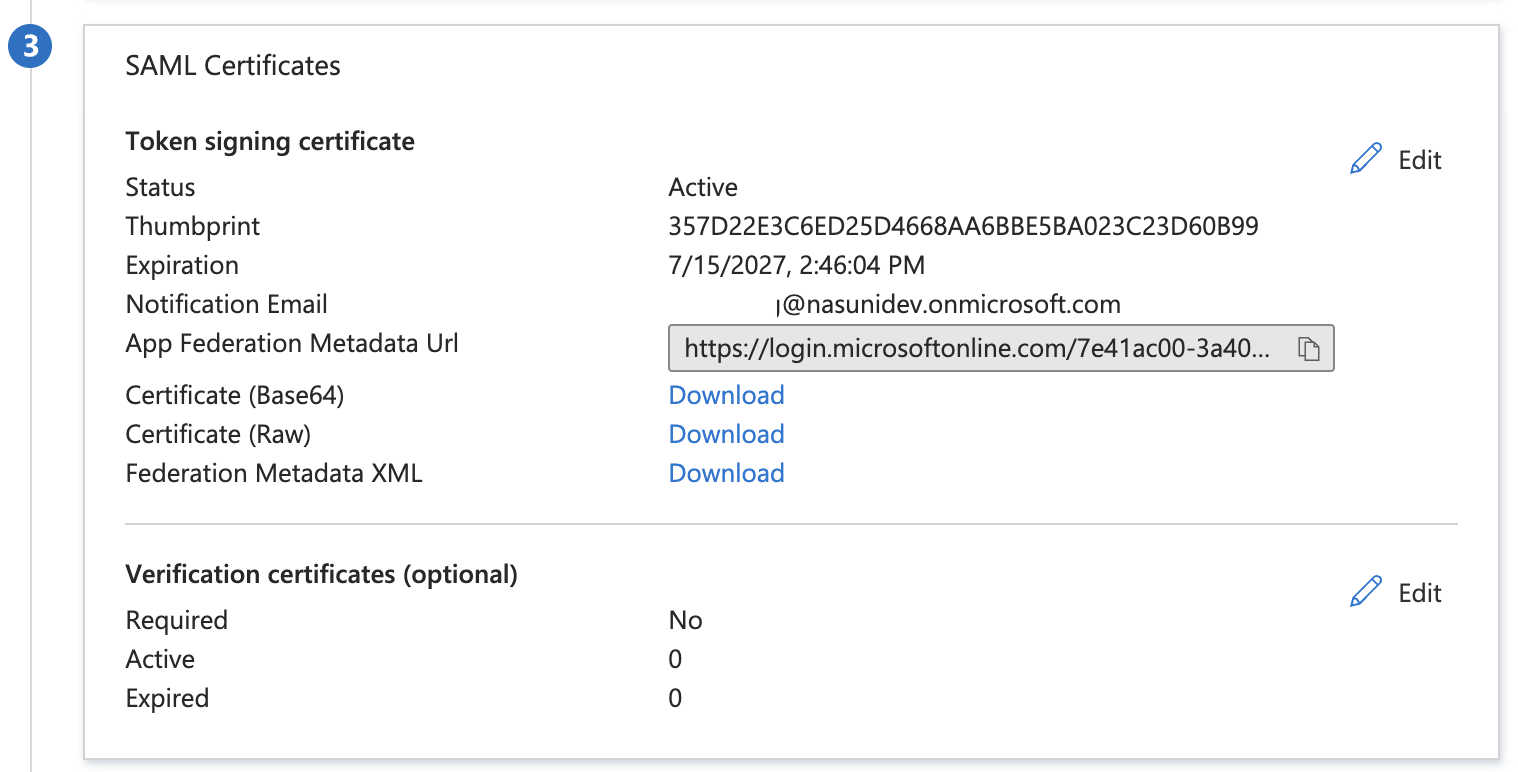
3. SAML Certificate
Now download the Certificate (Base64) from the "SAML Certificates" section. It will be used by Access Anywhere.
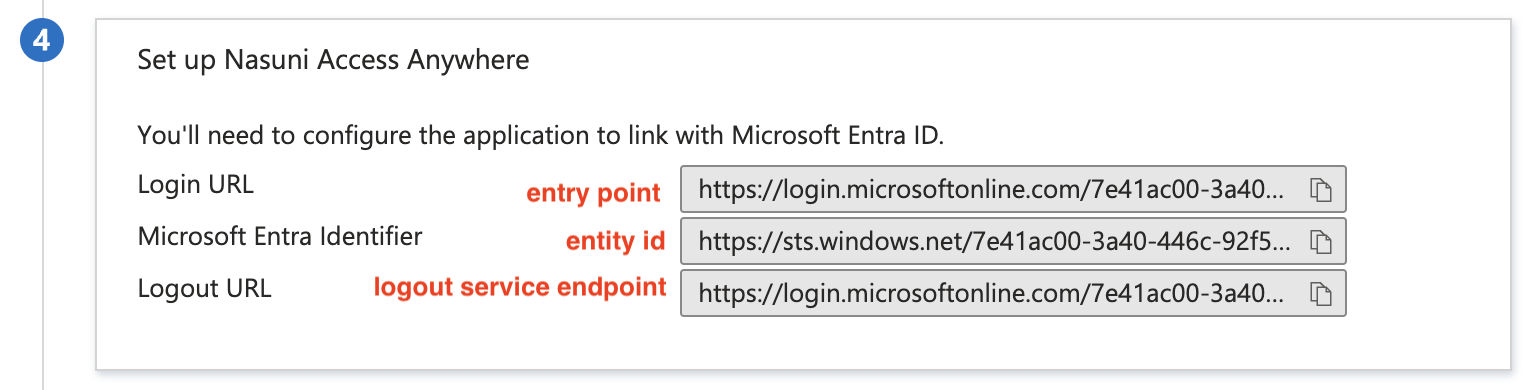
4. Set up 
Also copy and save these three URLs:
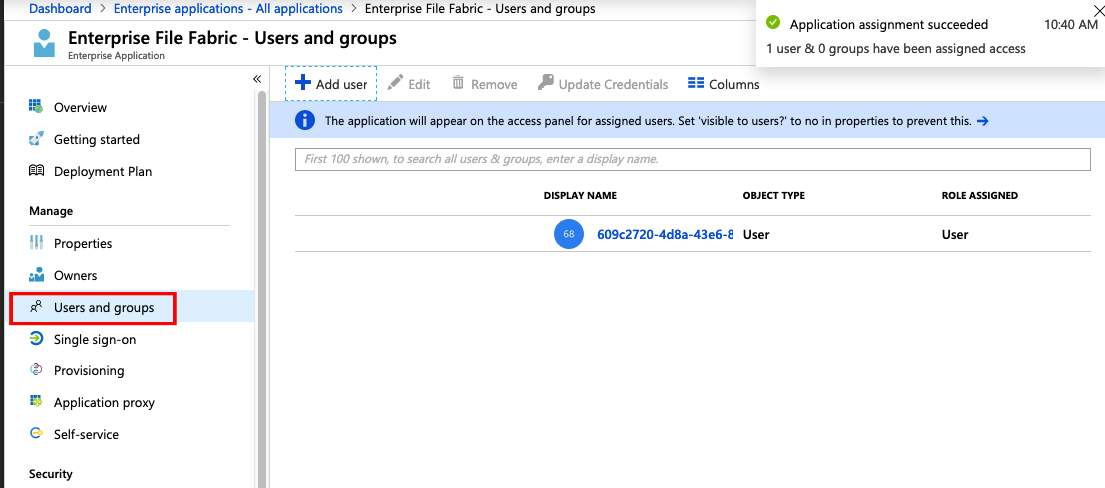
Users and Groups
Next we will make sure we have added the correct users and/or groups to the Enterprise Application. (only users/groups entered here will be able to log into the Access Anywhere server via this SAML integration)
5. Test single sign-on with 
Return to the "Single sign-on" section and select "Test" to see if single sign-on is working for a specific user.

Add SAML Auth System
As an Organization administrator, bring up the settings page from the menu Organization > Auth Systems.
Fill in the following details:
-
Auth system - Select "SAML"
-
Auth System Name - Azure SAML (for example)
-
Identifier (Entity ID) - As configured in your Azure enterprise app. Defaults to your appliance URL.
-
Login button label - Displayed on the Access Anywhere login page. Use something that the users will understand like “Login with Microsoft Azure”
-
The service provider entity ID - Enter the "Microsoft Entra Identifier" you saved from the Azure Enterprise Application SAML App setup screen above
-
SSO entry point - Enter the "Login URL" you saved from the Azure Enterprise Application SAML App setup screen above
-
Logout service endpoint - Enter the Logout URL you saved from the setup screen.
-
x509 Certificate - Enter the certificate text you downloaded from the setup screen above
Additional Options:
-
Force authentication - Disabled (recommended). When enabled users will be forced to re-authenticate rather than using any existing SSO sessions.
-
Sign AuthnRequest and LogoutRequest - Disabled. (We are not using verification certificates.)
-
Fetch User Role/Group Name by id - Disabled. (With Nasuni storage groups are not imported via Auth integration)
-
Azure AD Application ID - GraphAPI "Application (client) ID"
-
Azure AD Application Key - Enter the "Clients Secrets" value
-
User Login Settings:
-
Auto create user on login - Enabled. Required for users to be auto provisioned when logging in via SAML for the first time.
-
Refresh role/group membership on login - Disabled. Not required with Nasuni storage.
-
Update user info on login - Enable to update all user information on each SAML login including email.
SAML User Import Fields
-
Unique User Attribute Field - username
-
User Login Field - loginname
-
User Name Field - fullname
-
User Email Field - email
-
Role/Group Name Field - groups
-
User Phone Field - phone
Enabling Identity Provider Initiated Flow
Once your Auth System has been created in Access Anywhere, you will then be able to obtain a Reply URL. From the Auth Systems screen, copy the URL supplied next to the Reply URL field.
Go back to the Enterprise Application you created within Azure, and edit the Basic SAML Configuration. Replace the Reply URL with the URL from the Auth System screen.
Azure provides mechanisms to test the integration.
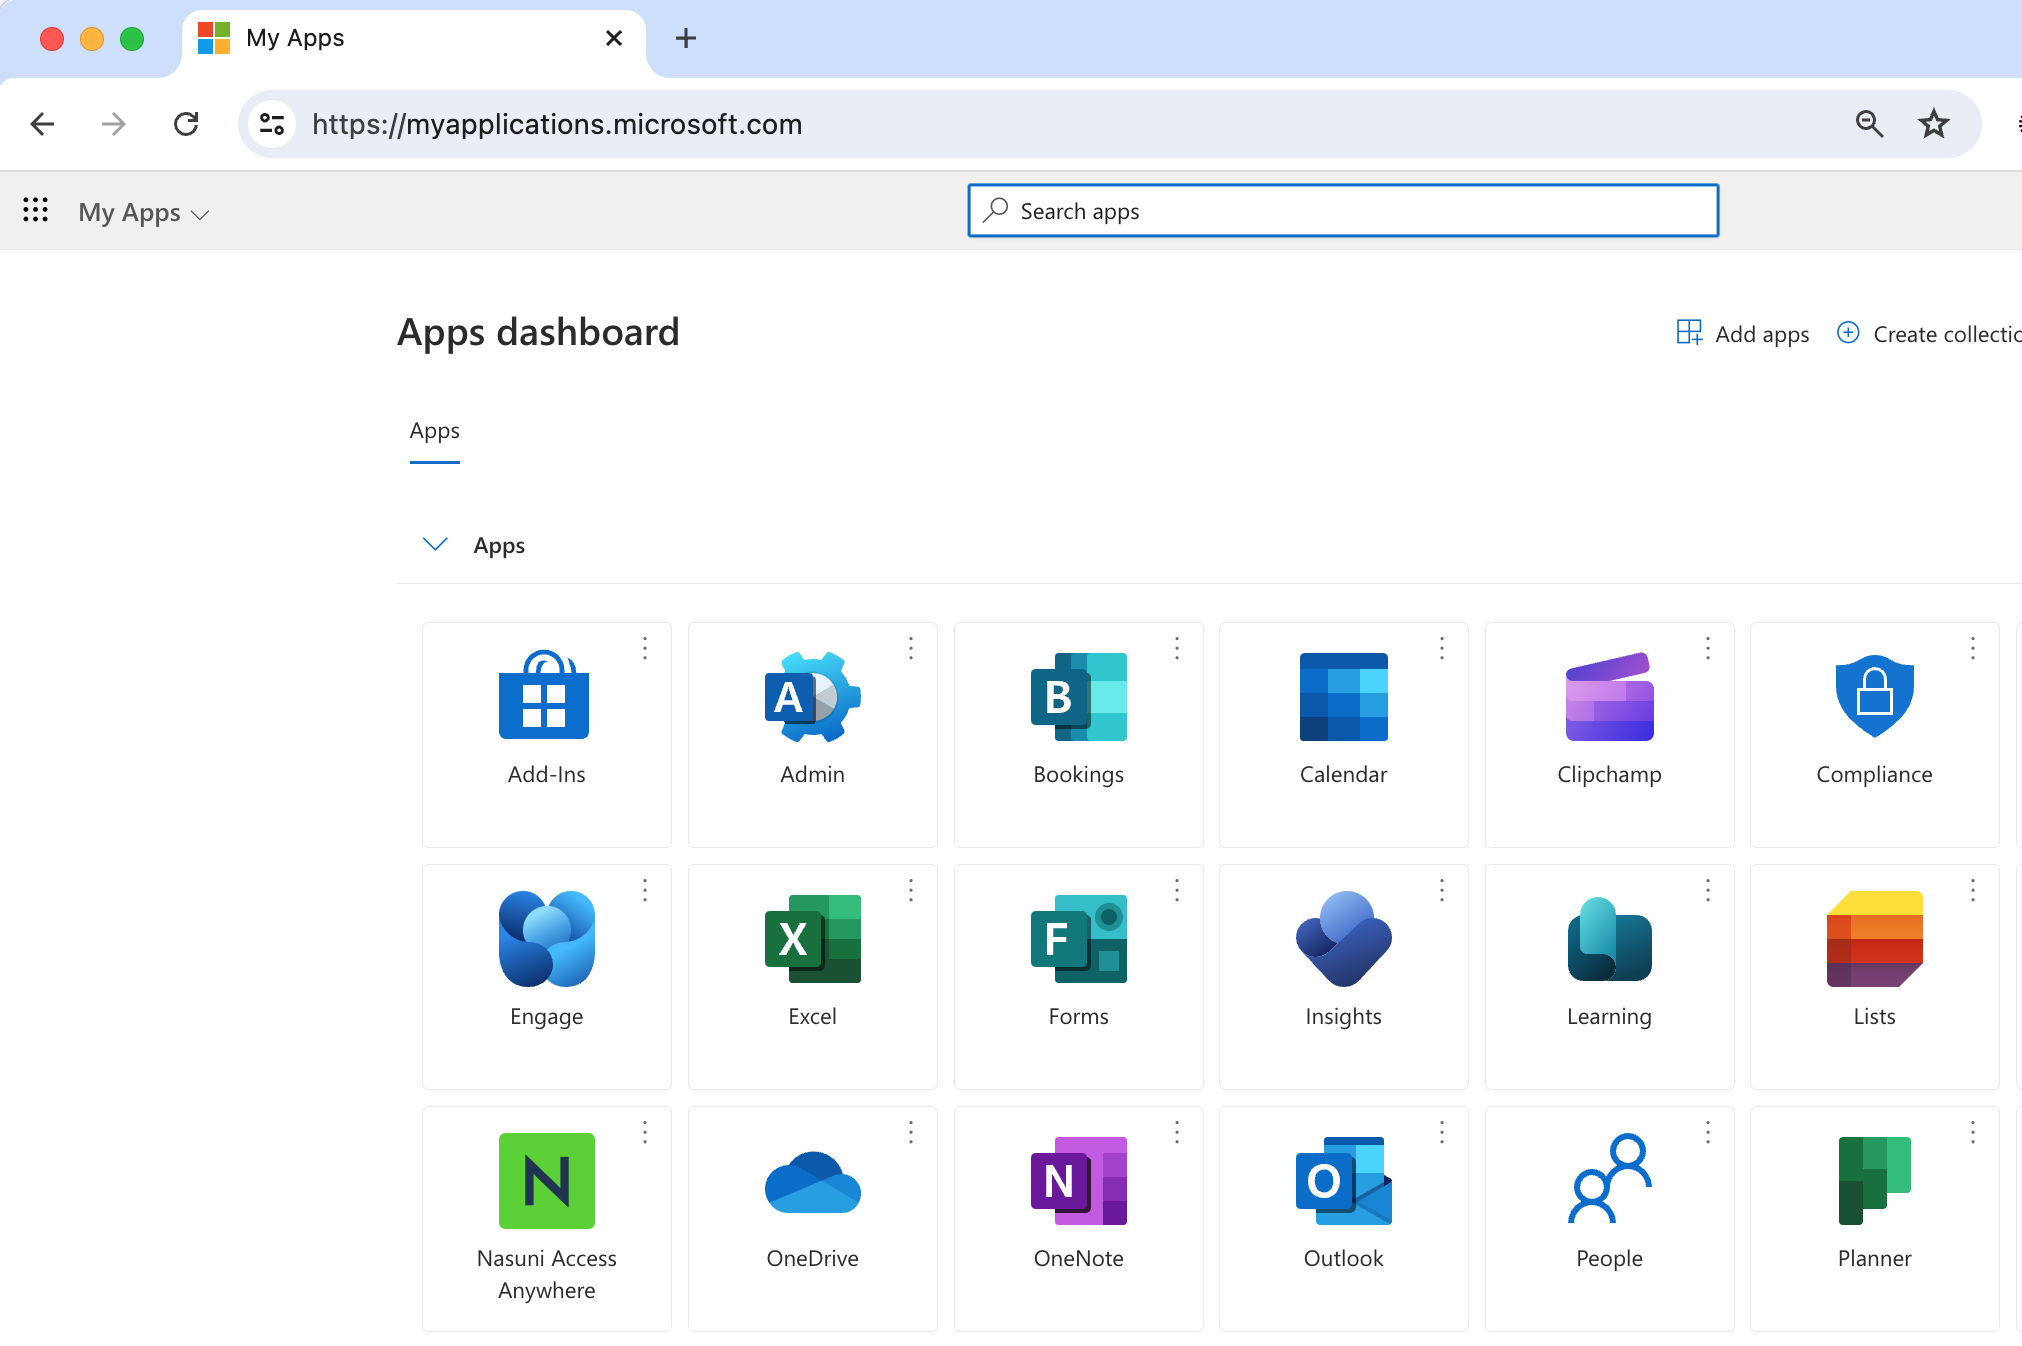
Your users will be then able to access the application from: https://myapplications.microsoft.com/
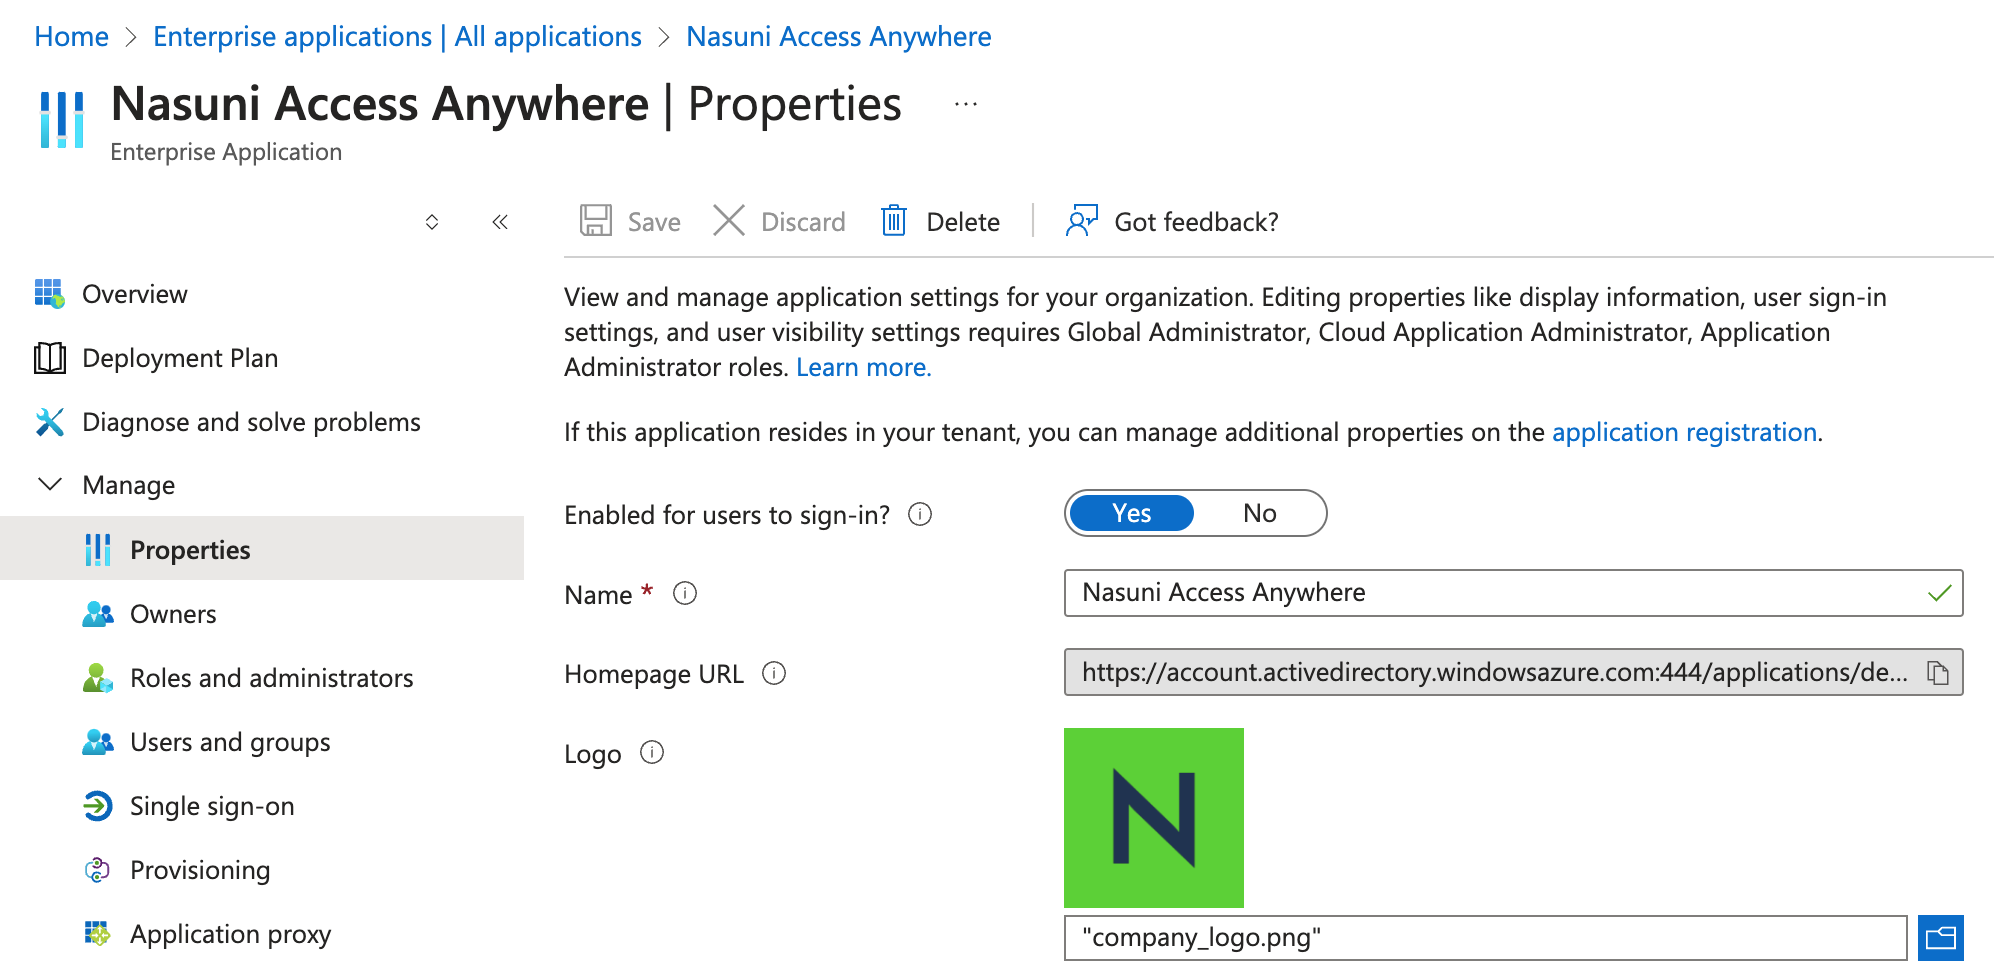
Changing App Icon
The application icon shown in My Apps can be changed within the Azure Enterprise Application under Manage > Properties.
The logo currently configured for your appliance can be found at
https://files.example.com/images/company/company_logo.png.
Set Up The Graph API
In order to map group identifiers to group names from Azure we will need to enable the Microsoft Graph API.
In App Registrations, create a "New registration", naming it something like "NAA GraphAPI".
Once created, we will edit the API permissions, and "Add A Permission".
From the list, select Microsoft Graph.
Select Application permissions when presented with the choice.
Input "Directory.Read.All" into the search field and select the permission when returned.
Click Add permissions
These permissions will need to be granted for the organisation, by clicking the Grant admin contest for XX Directory.
Now we will gather the credentials. In "Overview", copy the "Application (client) ID".
In "Certificates & Secrets", click "New client secret" in "Clients Secrets" section. Set Description to something like "NAA" and decide when it expires. Now copy the new Value added in the Client Secrets section.
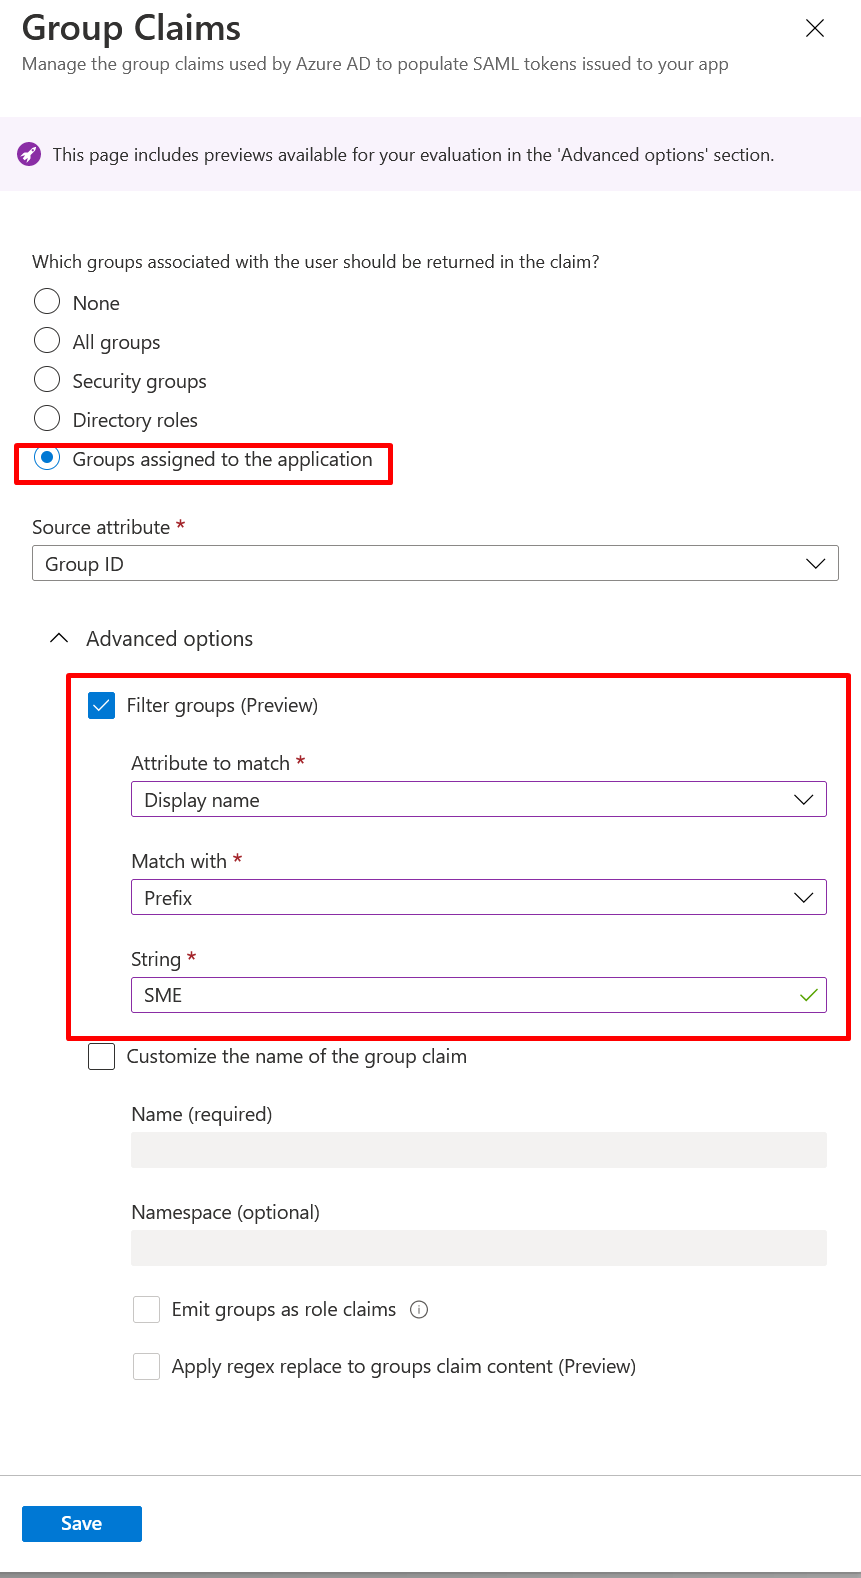
Users with more than 150 groups
If you have a user with more than 150 groups the SAML assertion returns a Microsoft Graph link instead of a list of groups. To resolve this you will need to update the Entra App to filter the groups just to the roles you would like to leverage in Access Anywhere.
You can achieve this either by selecting an option like "Groups assigned to the application" and assign the relevant groups to the Entra App, or apply a filter to restrict based on a given prefix or suffix.