Googleworkspace
Google Workspace SAML App
As the administrative user for your Google Workspace domain, login to the Google Workspace Admin page.
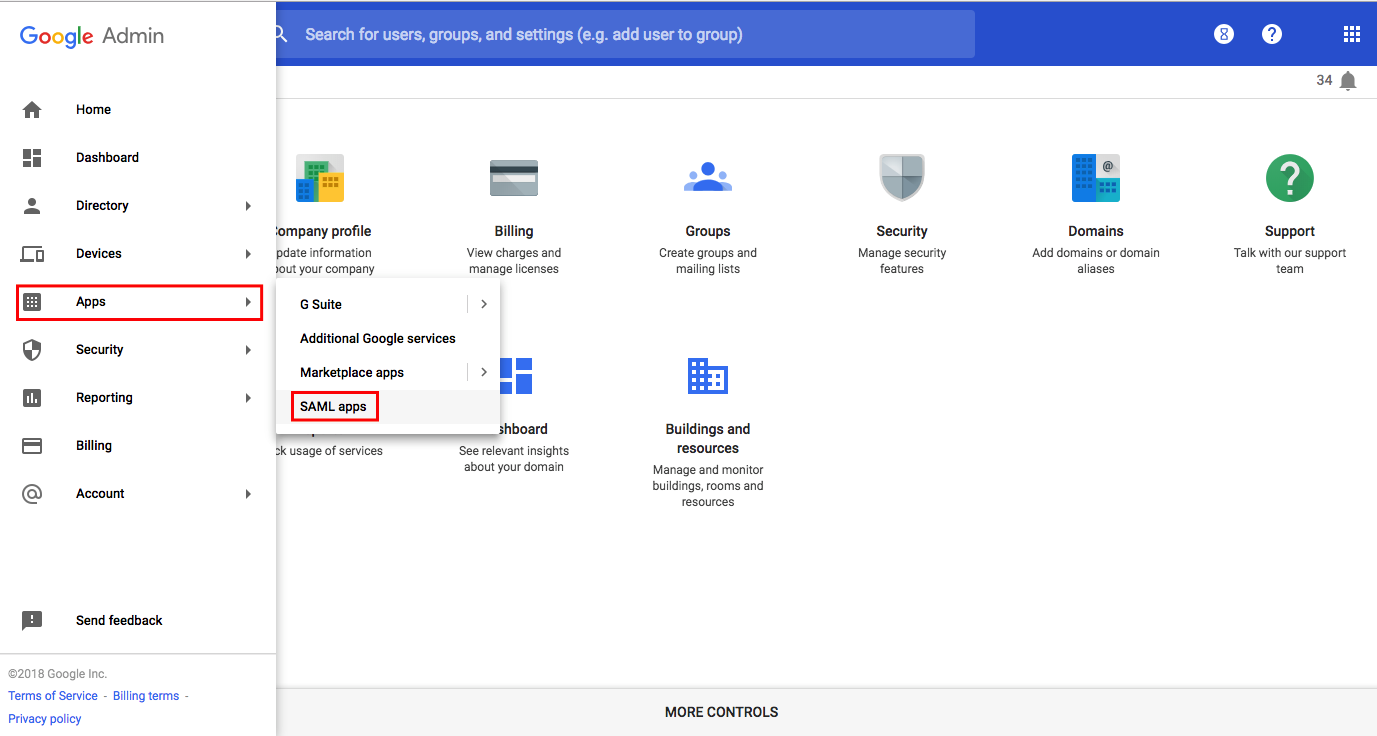
Then Select Apps > SAML Apps from the menu on the left hand side of the screen ("hamburger menu").
On the following screen, click the yellow plus (+) symbol in the bottom left to add a new SAML Application. Then select "Setup my own custom app"
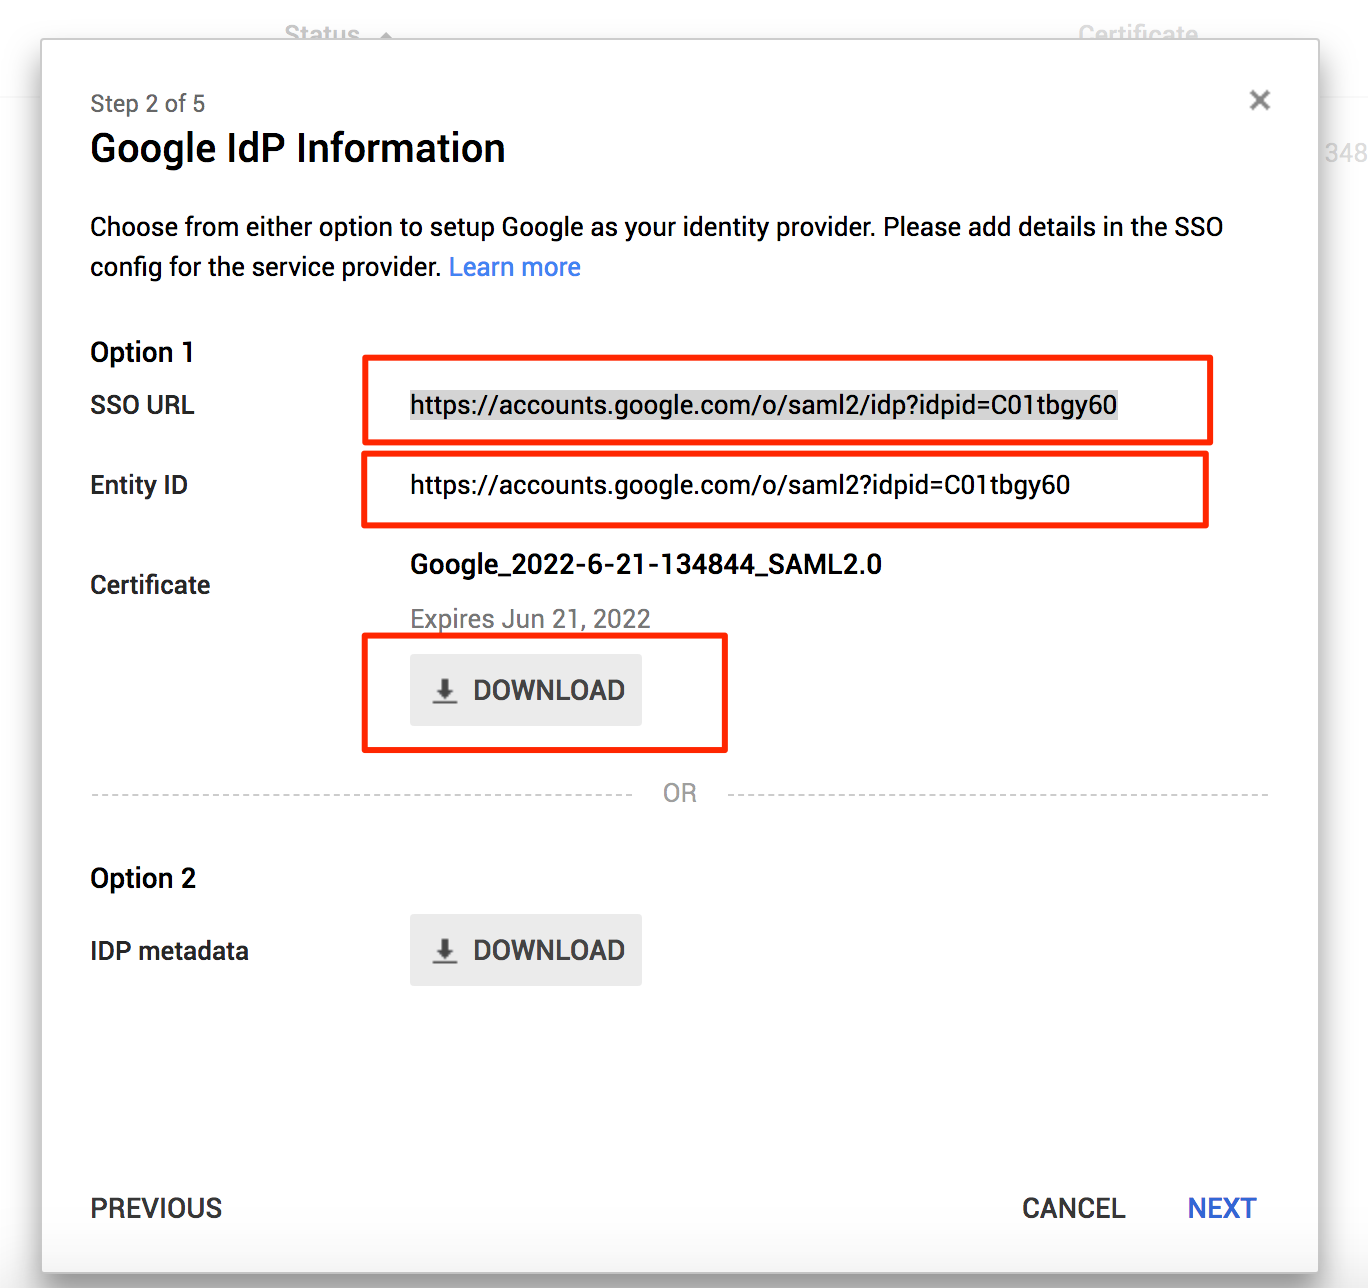
On the next screen you will want to save the SSO URL, Entity ID and download the certificate.
On the next page enter an Application Name that matches your Access Anywhere system, and use any Description or Logo you would like, and click next.
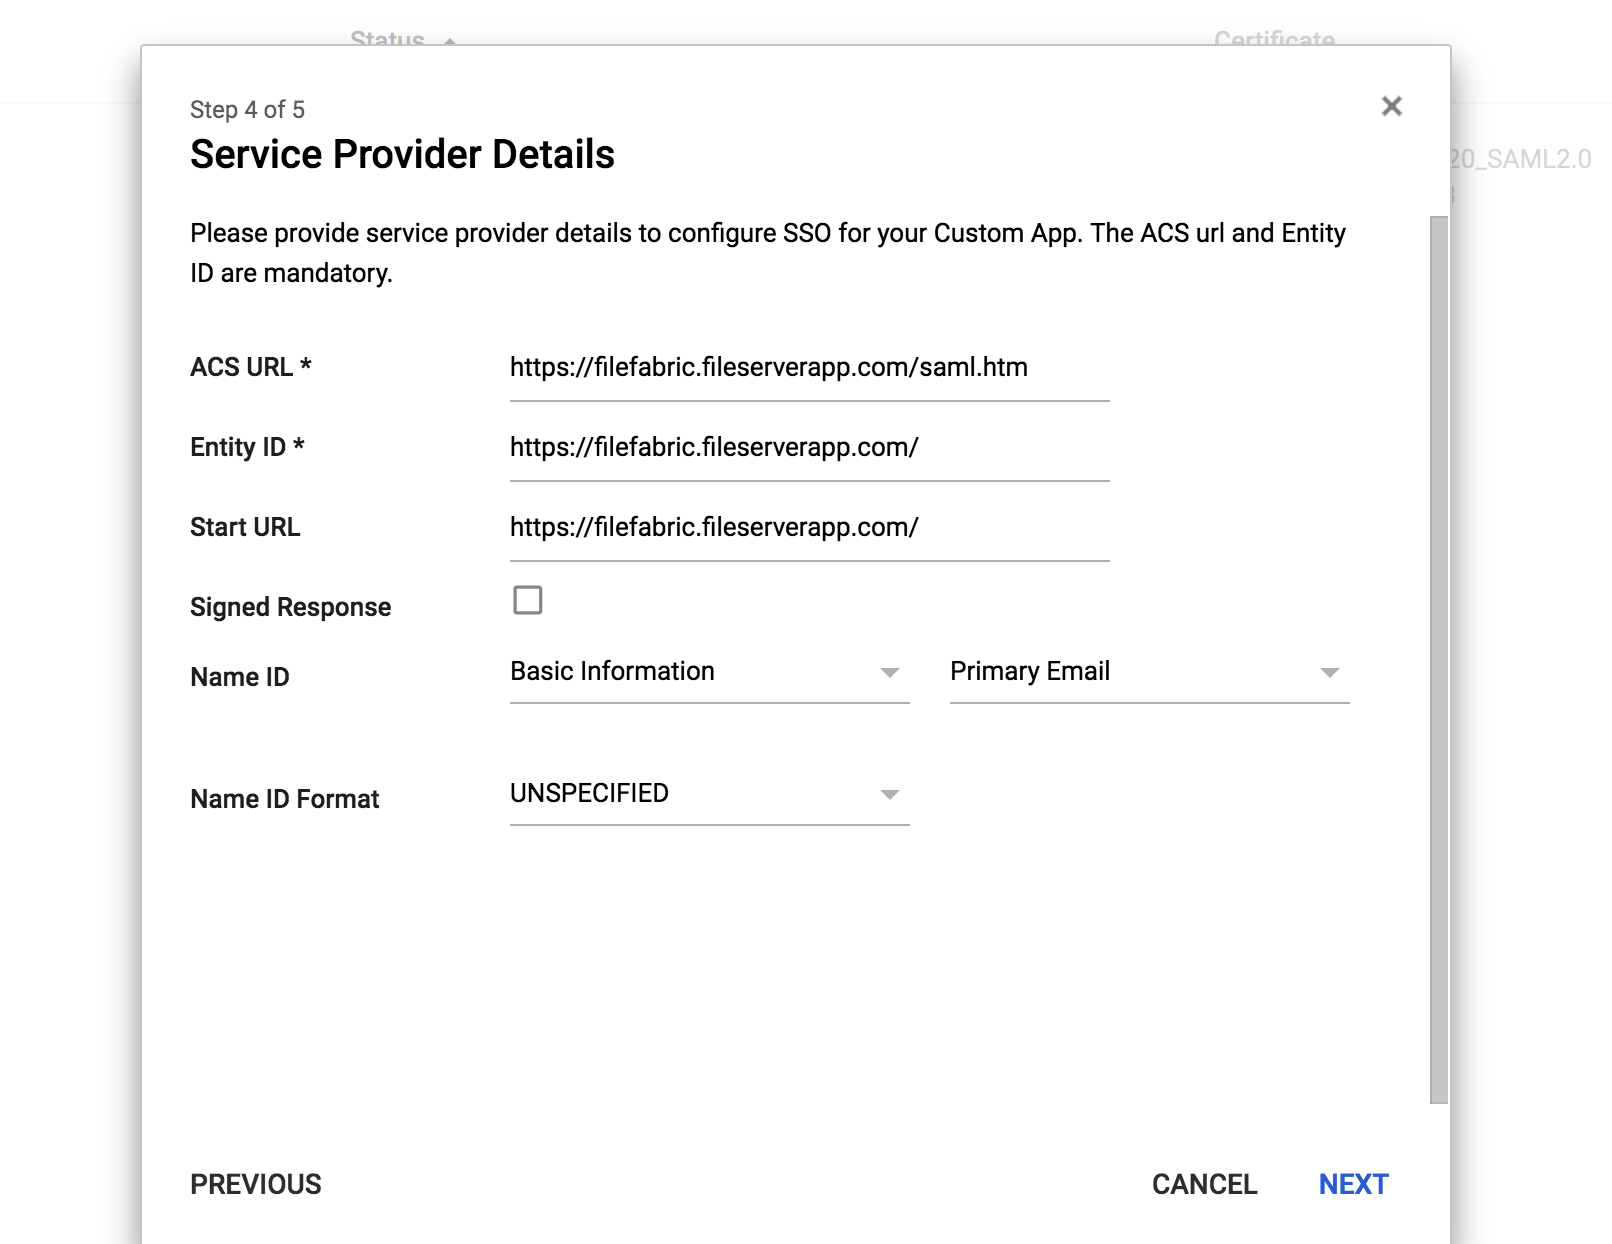
Next fill out the "Service Provider Details" like so:
ACS URL = Access Anywhere URL + "/saml.htm" - ex: https://filefabric.fileserverapp.com/saml.htm
Entity ID = Access Anywhere URL - ex: https://filefabric.fileserverapp.com/
Start URL = Access Anywhere URL - ex: https://filefabric.fileserverapp.com/
Name ID = Leave as Default: Basic Information > Primary Email
Name Format = Leave as Default: Unspecified
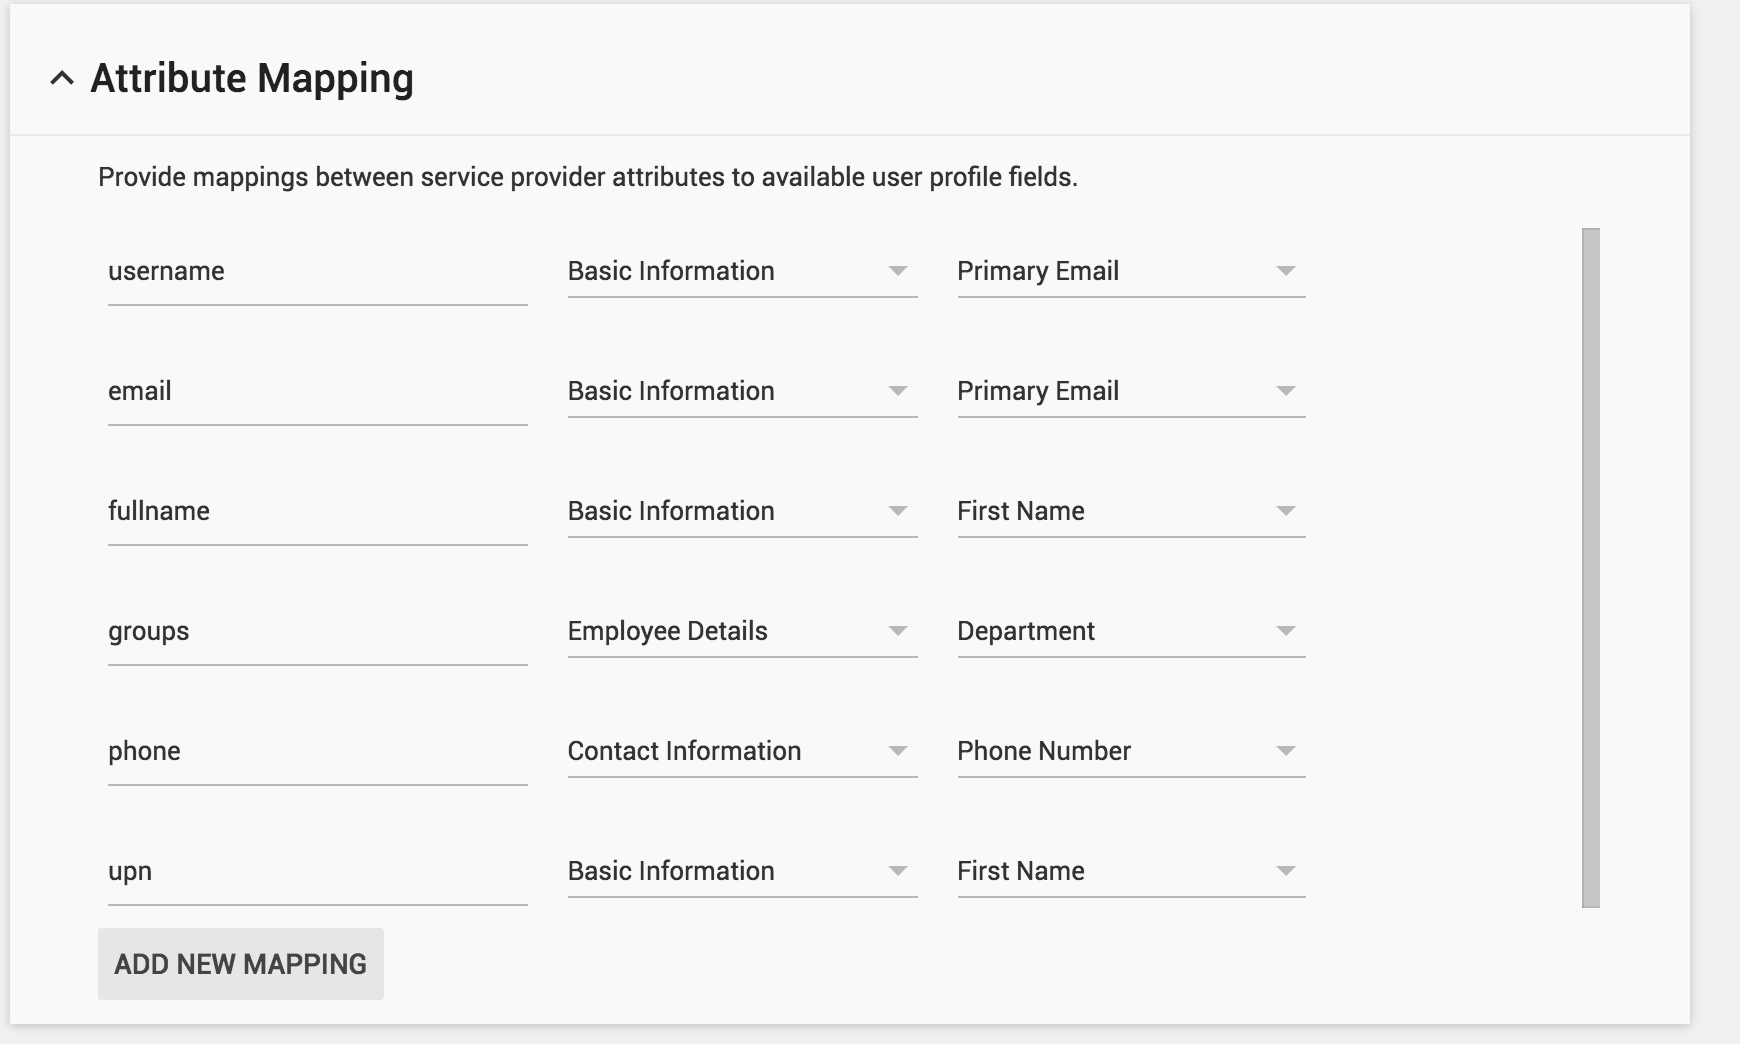
We will set up the following mappings in the Attribute Mapping Section:
Username > Basic Information > Primary Email
email > Basic Information> Primary Email
fullname > Basic Information > First Name
groups > Employee Details > Department
phone > Contact Information> Phone Number
upn > Basic Information > Full Name
Click Finish to complete the setup of the SAML App.
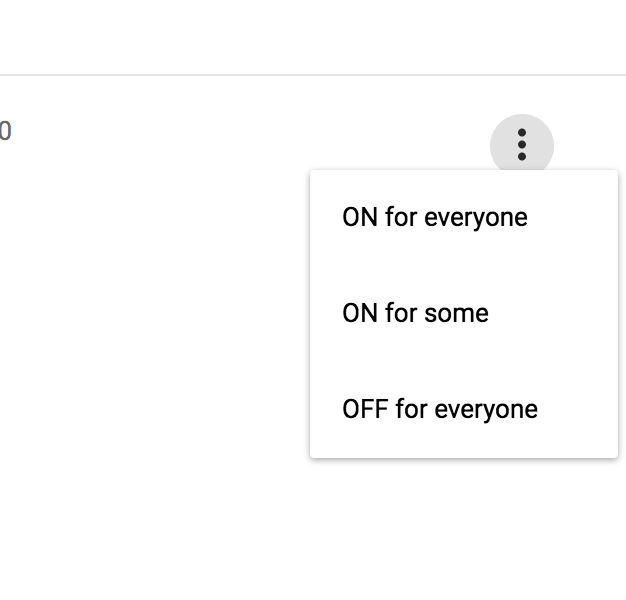
Finally select the three dot menu for the app and select "ON for everyone" to enable all of your Google Workspace users to use this app.
Access Anywhere Auth System
As the Org admin, we will now enable the SAML Authentication.
Click on: Organization > Auth Systems.
Select: Auth System > SAML 2
Fill in the following details:
Auth System Name - Google Workspace SAML
Login Button label - This text field will be what is displayed in the login button on the Access Anywhere login page. Use something that the users will understand like "Login with Google"
The service provider entity ID - Enter the Entity ID you saved from the Google SAML App setup screen
SSO Entry point - Enter the SSO URL you saved from the Google SAML App setup screen
Logout Service Endpoint - https://accounts.google.com/Logout
Certificate Data = Enter the certificate text you downloaded from the Google SAML App setup screen
Fetch User Role\Group Name by id - Leave unchecked
Auto create user on login - Check if you would like users to be auto provisioned when logging in via SAML
Update user roles/groups on login - Check if you would like Access Anywhere roles to be updated on user login
Update user info on login - Check to update all user information on SAML login
User Import Fields
Ensure the following mappings are set:
Unique user attribute > username
User login field > username
User Name field > fullname
User email field > email
Role\Group name field > groups
User Phone field > phone

Click Test and then Update to save these settings