Active Directory Integration
Last updated Mar 19, 2024
See also:
How to Connect Access Anywhere to Active Directory
To connect directly to an AD environment via an LDAP connection choose the Auth Sytem "Active Directory via LDAP".

Active Directory Auth - via LDAP
Entering Connection Information
The first section of the Auth Systems section is the connection to the AD environment
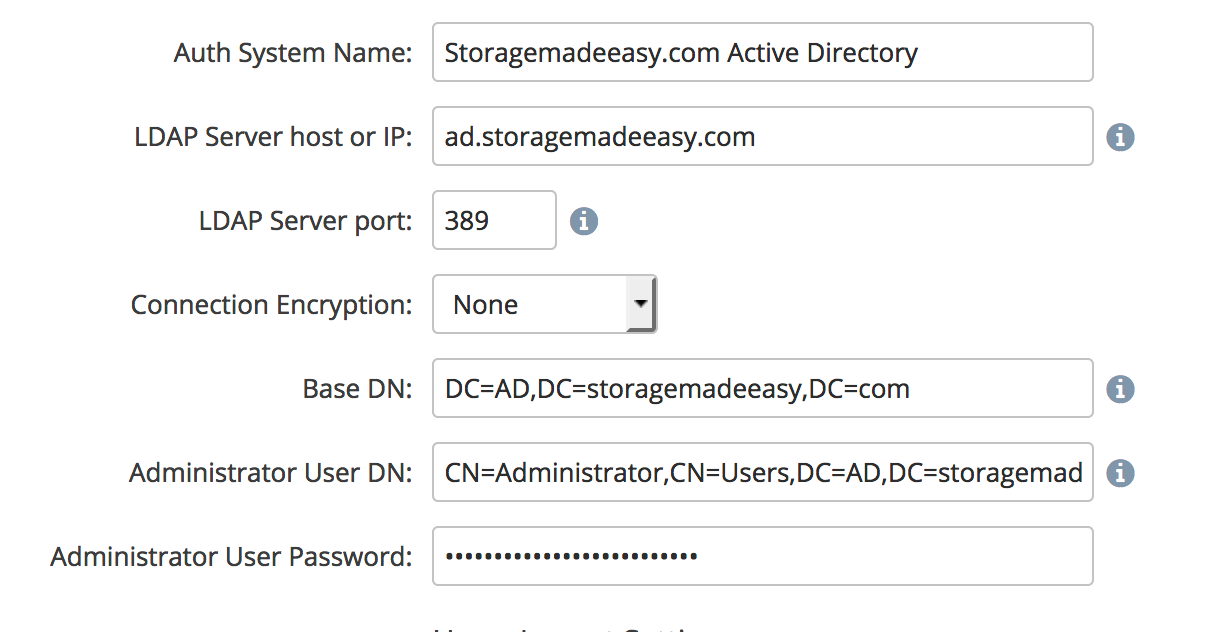
Auth System Name - Enter any label you want for this Auth System.
LDAP Server host or IP - This is the dns resolvable hostname, or the IP address for your AD servers which are listening for LDAP connections.
For high availability you can enter multiple addresses. Enter the host like you would normally then subsequent hosts separated by a space and include the protocol.
In case NAA can not connect to the first AD, next one will be tried.
LDAP Server Port - Can leave the default (port 389) if the Connection Encryption is none or TLS. Use port 636 for SSL. Or other port if you are using non-standard ports for your AD environment.
Connection Encryption - Select the encryption method your AD environment supports.
Base DN - Enter the Base DN for your enviornment. This is dependent on your AD environment setup.
Administrator User DN - Enter the DN for a service account in your AD environment that we will use to connect.
Administrator User Password - Password for the account entered in the previous field.
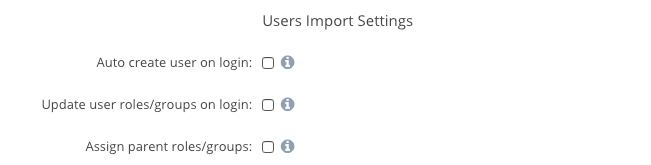
User Import Settings
The next three boxes should be checked if you want Access Anywhere to automatically create new users and roles/groups when a user logs in and their account and/or groups do not exist in Access Anywhere.
If you do not check these, you must import the Users and Roles you want to have access to the system.
User Directory Settings
The next section will describe how your directory defines the users we will use in Access Anywhere.

User Object Class - For Active Directory we will select "users"
Additional Custom User Object Classes - If you have additional classes which represent the users on your system, you can enter them here in a comma separated list. Standard AD installations will leave this blank.
Login Field - This defines the attribute which NAAwill use for the NAALogin attribute in Access Anywhere. Standard AD installations should use either sAMAccountName or userPrincipalName
Use Customer User Login Field - If Checked then you can select a custom field for the NAALogin. Standard AD installations will leave this blank.
Unique User Attribute - This defines which field will be used as the unique user ID with Access Anywhere. Standard AD installations should use either sAMAccountName or userPrincipalName.
User Name Field - This defines which field will be used for the NAAUser Name attribute. Standard AD installations should use displayName.
Use Custom User Name Field - If Checked then you can select a custom field for the NAAUser Name. Standard AD installations will leave this blank.
Use Custom User Email Field - If Checked then you can select a custom field for the NAAemail. Standard AD installations will leave this blank.
Automatically detect domain password changes - If Checked end-users will be automatically logged out when passwords on Active Directory have changed, requiring them to log back in with the new password. Passwords are checked for each user every 24 hours and also when a desktop or web application connects back to the sever using an API token.
Group Directory Settings
The next section will describe how your directory defines the groups we will use for the roles within Access Anywhere.
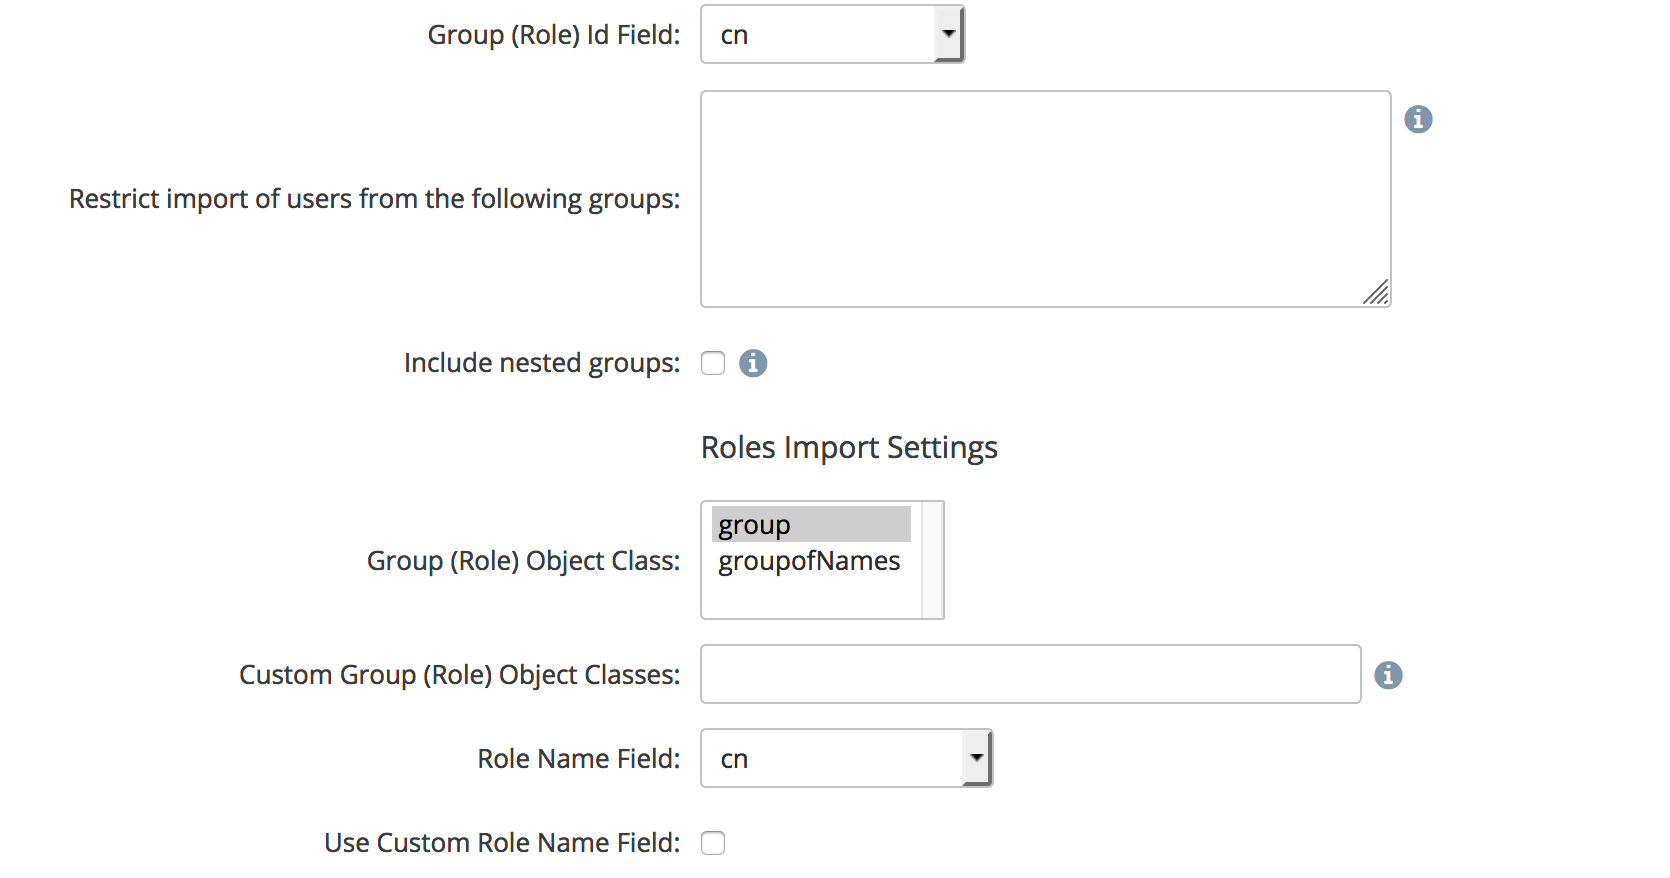
Group (Role) id Field - This will define which field to use in the directory to create the Roles within Access Anywhere. Standard AD installations will select cn.
Restrict import of users from the following groups - Enter any group DNs for groups within your directory which you want to limit which users can access Access Anywhere.
Group(Role) Object Class - This defines the object class the directory users for group objects. Standard AD installations will select group.
Custom Group (Role) Object Classes - Here you can add additional classes which represent groups in your Directory, in a comma separated list. Standard AD installations will leave this blank.
Role Name Field - This defines which field will be used to set the Group name in Access Anywhere. Standard AD installations will use cn.
Use Custom Role Name Field - If checked then you will be able set a custom field name to be used for Access Anywhere group Names. Standard AD installations will leave this blank.
Auto-Config Provider (Optional)
This optional setting will allow you to define Private Providers for each user in your directory. This can be used for things like user home directories and the like.
Using LDAPS (Optional)
When you add an LDAP external authentication system to Access Anywhere, you have the option of using LDAPS. If you use LDAPS (port 636) then Access Anywhere will communicate with the authentication service using encrypted traffic. It will also, by default, try to ensure the identity of the authentication system.
In some cases, such as when AD is used, the authentication system will have a certificate signed by the domain and not a commercially registered Certificate Authority. In that situation you have to tell Access Anywhere to bypass the Certificate Authority verification and accept an LDAP-based authentication system with any non-expired cert. You can do this by adding:
to /etc/openldap/ldap.confThis is a global setting for LDAP on Access Anywhere.
Azure AD Domain Services (LDAP)
Azure AD Domain Services can be used as an LDAP provider. We recommend enabling and configuring Secure LDAP.

Other Settings:
-
User Object Class: user
-
Login Field: sAMAcountName
-
Unique User Attribute: sAMAccountName
-
User Name Field: cn
-
Group (Role) Id Field: cn
-
Group (Role) Object Class: group
-
Role Name Field: cn
Using the Active Directory Auth Provider
Importing Users and Roles from AD
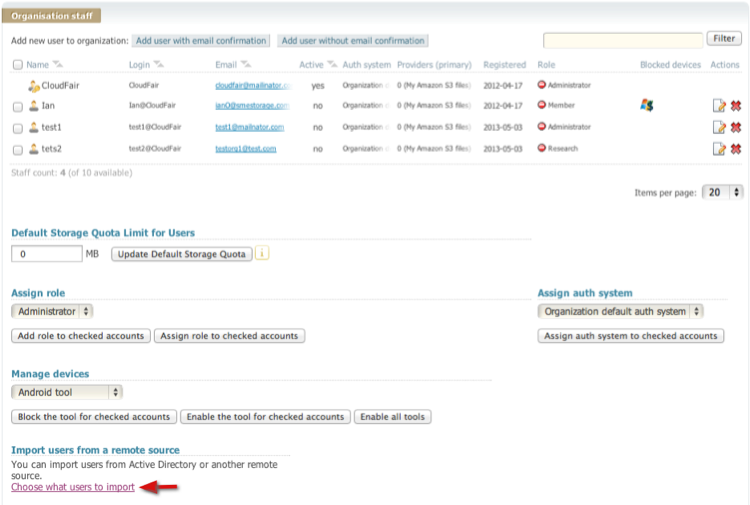
After AD and the Access Anywhere Server have been successfully connected navigate to the "Users" option from the web menu. There will now be a further option, "import users from Active Directory". Clicking this link will show users that are available in Active directory for import / mapping to the Cloud File Server.
Choosing user to import
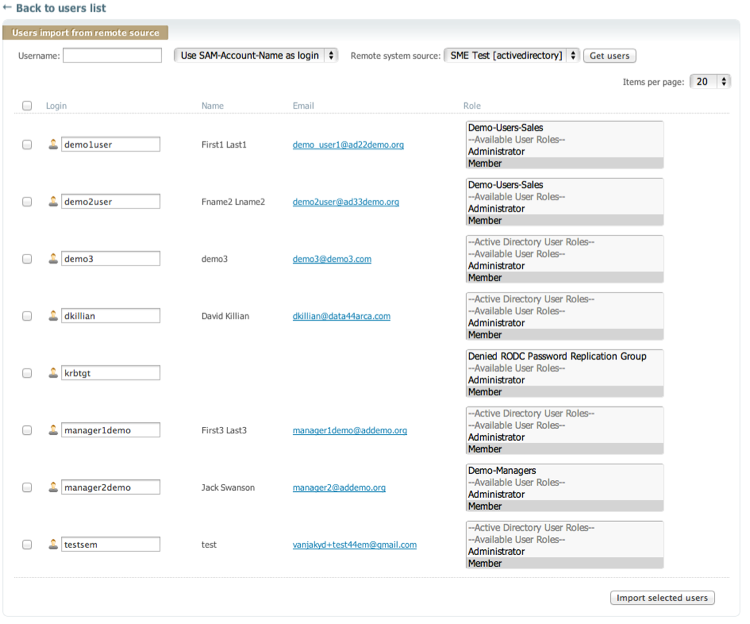
Once the users from the Active Directory Server are visible users can be selected for import (and roles separately if required) from the set by selecting the role drop down. If multiple roles are required choose shift-select to select more than one role.
When complete click the "import selected users" box.
The NAAuser login ID will be {AD User UPN Logon }@orgname
Importing Roles Directly
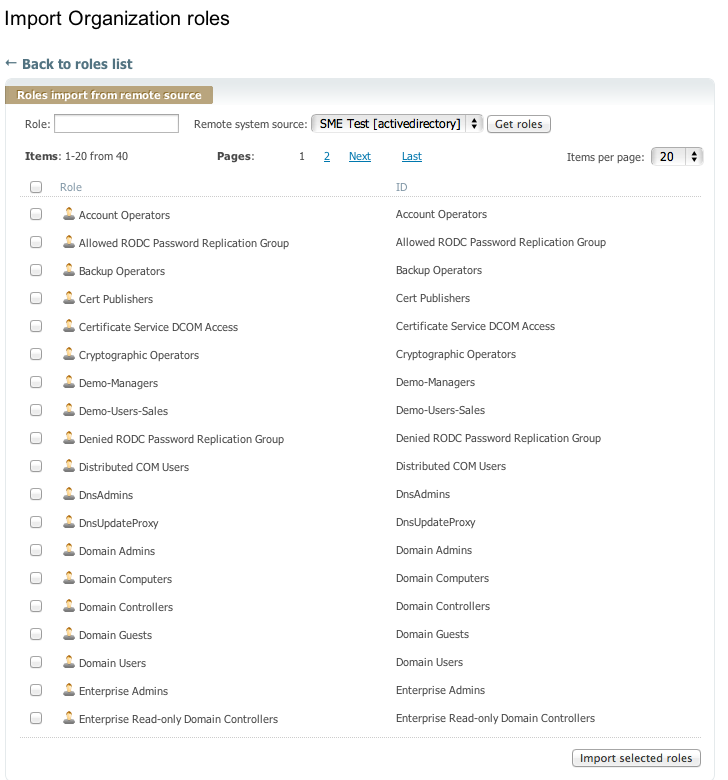
if the Cloud File Server users have been setup directly it is still possible to import roles separately from Active Directory. To do this login as the Cloud Administrator on the web, click on the Roles menu option in the right sidebar and click the link, "choose what roles to import". This will bring up the Active Directory Roles that can be imported and used with existing users.
Managing Users and Roles
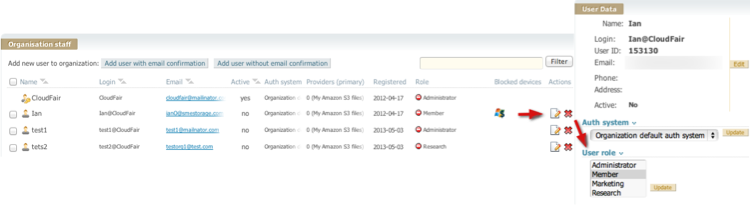
User role mappings can be managed from the User option in the right sidebar after logging in as the Cloud Admin. This lists all users and the Role that is assigned to them. Clicking on the edit icon enables options to be changed for an individual user, one of which is the Role Option.
Assigning Permissions to Roles

Once Users and Roles are set up then permissions can be set against a Shared folder by logging into the Web as Cloud Admin and selecting the 'Shared Team Folders' option from the right sidebar. Permissions can be set in one of three ways:
-
At a Folder lever
-
At a Roles level
-
At a user level
The precedence is applied in the following order (lowest first)
-
Folder permissions
-
Role permissions
-
User permissions
Where a user is in multiple roles then least restrictive applies.
User Login
Once the users have been setup they can login directly use their normal Active Directory to login through the Access Anywhere Server. On login their user credentials are sent to AD and if the user is authorised then this is passed back to the Access Anywhere Server which issues a token for access. This token will then be used for NAAFile Server access for the users sessions and will be passed with each request.
Active Directory FAQ
There are a few caveats to consider when working with users from Active Directory:
-
If you create a new user in Active Directory that you wish to make available to the Access Anywhere Server then you just need to re-run the import users and roles and select the user(s) that you wish to add.
-
If you create a new user on Active Directory and you wish to click the "Change password on next logon box" ensure the user has changed the password before you map them to the Cloud File Server as they will be unable to do it from here.
-
You can mix and match users from Active Directory with users created directly in the Cloud File Server.
-
Multiple Active Directory Domains can be supported
ADFS
If you are a company that has Active Directory Federation Services enabled and are interested in integrating with your Active Directory system using SAML assertions then please see /Admin/Saml