**This is an old revision of the document!**
Warning: Undefined array key 2 in /var/www/lib/plugins/markdowku/syntax/ulists.php on line 79
Cloud Drive for Windows
Last update: Jan 23, 2024
Overview
The Cloud Drive App for Windows allows users and applications to access all their private and public cloud storage, network file systems and other distributed storage from their Windows desktop as if it were a single virtual filesystem. The drive, a component of the Nasuni Access Anywhere platform, allows secure, file-based access to corporate data wherever it is hosted, for both office workers and remote users.
Users can browse and open remote files with their favorite desktop applications including Microsoft Office. The drive includes a local cache and upload manager for performance. It is accessible from the command prompt and can be used in scripts.
Features
- Remote files and objects can be browsed, opened and edited as files through Windows applications.
- Copying, moving and renaming of files and folders is supported.
- Files are uploaded asynchronously. Users can view and manage the upload queue.
- Drives can be referenced in scripts and used from the command prompt just like local file systems.
- Fully brandable for white label, OEM or corporate use through the App Suite Packager. Ability to lock down endpoint.
Getting Started
Installation
After the Nasuni Access Anywhere App Suite has installed the Cloud Drive a Select Additional Tasks dialog is shown.
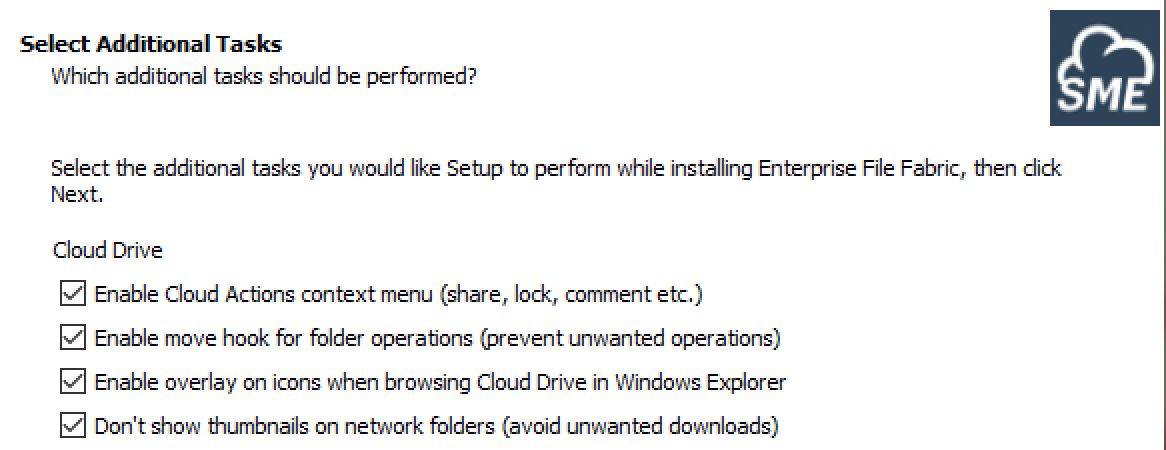
These options are only available via the installer (which can be run multiple times)
- Enable Cloud Actions context menu - Access sharing, comments, locking from within File Explorer.
- Enable move hook for folder operations - Rename and move operations are processed by Access Anywhere.
These options are also available via Cloud Drive Menu or Settings:
- Enable overlay on icons - Indicates cache status in File Explorer
- Don't show thumbnails on network folders - Reduces network bandwidth
Startup
After installing the Nasuni Access Anywhere App Suite the drive can be found via the Start Menu > Nasuni Access Anywhere > Cloud Drive. If the drive app is running you can also locate the drive icon in the Windows taskbar. Choose “Start Drive” from the right-click menu.
Connect to Access Anywhere
You will need a username and password, as well as the endpoint for your instance of the Nasuni Access Anywhere to start the drive. The endpoint is typically the same as the URL you use for the Cloud File Manager Web App.
If your system is set up for single sign-on, you may be asked to use your corporate credentials. Two-factor authentication may have also been configured for your account.
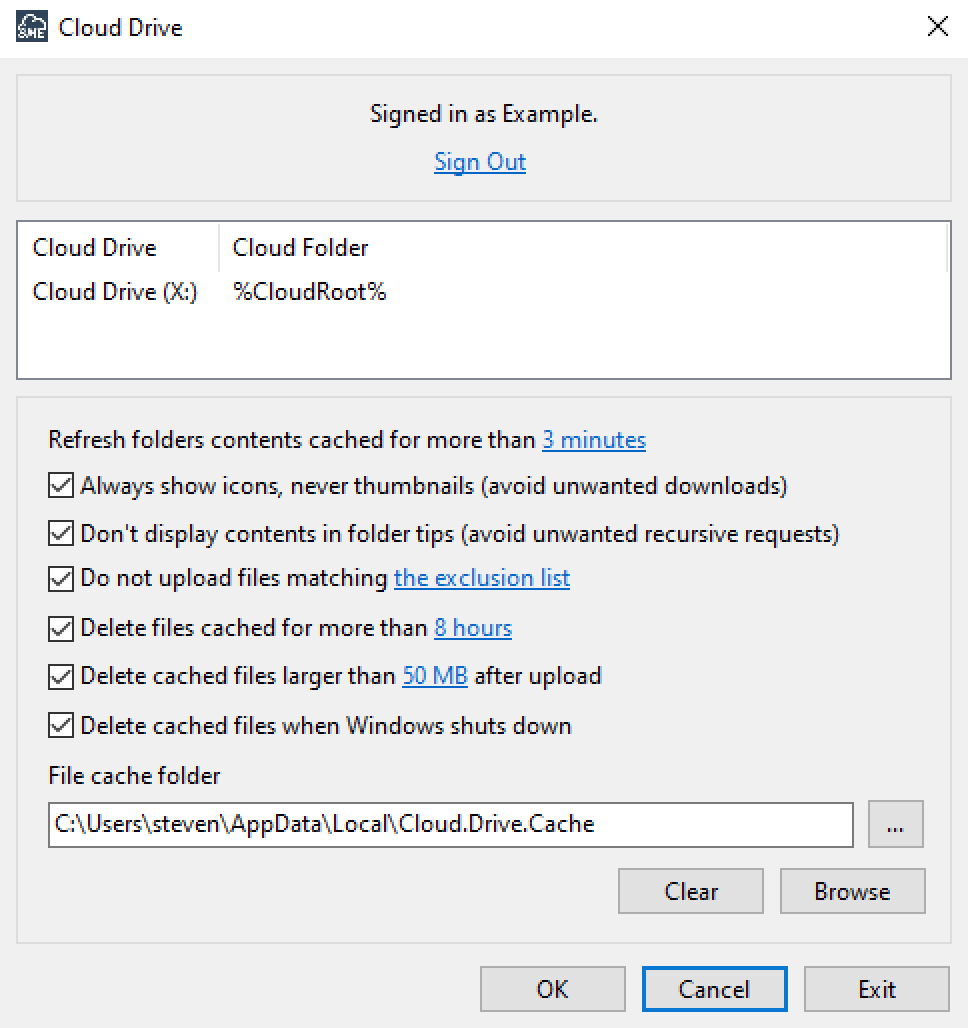
Once you have logged in the drive will be connected to Access Anywhere. You'll also see the Settings screen below. Click the “OK” button to accept the defaults and you can start using the drive. You can access the settings again from the taskbar icon.
Folders, Files and the Cache
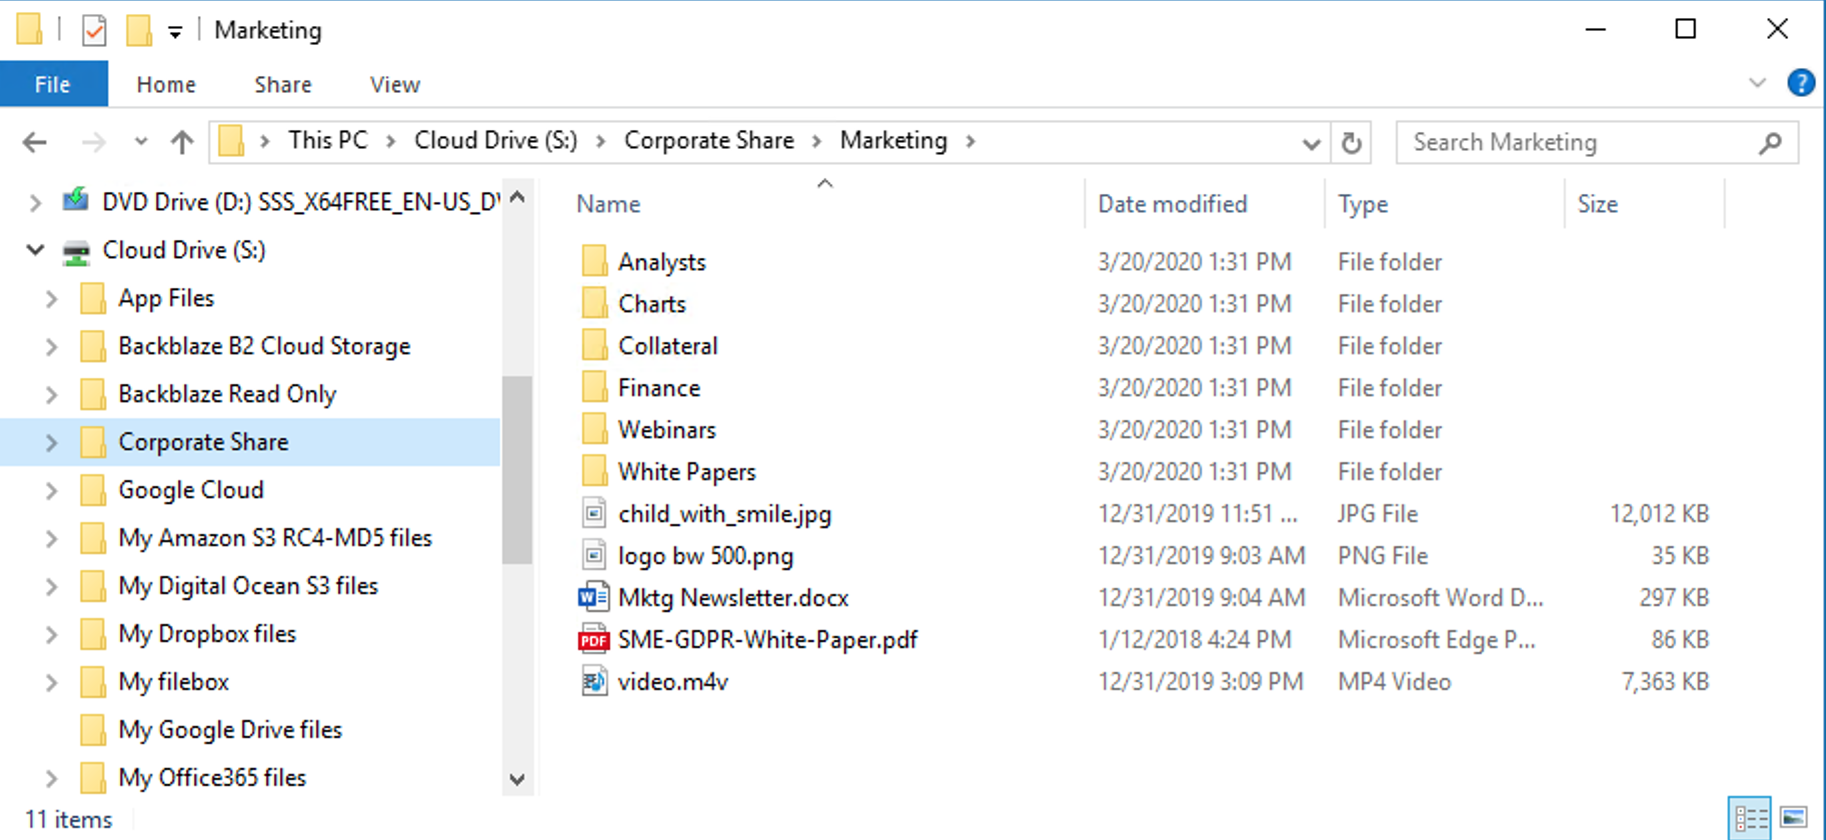
Open the drive in the Windows File Explorer by clicking on the drive letter. You can also click on the taskbar icon.
All folders and files indexed by Access Anywhere, potentially from many different cloud and on-premise storage services will be shown through the single virtual drive.
For performance, each folder listing and file is only downloaded (and cached) as needed.
If you have Show overlay icons enabled you can see visually if a file has been downloaded into local cache:
- Blue Cloud - File is available in the cloud.
- Blue Replace - File is currently being uploaded to the cloud.
- Green Check - File is available in local cache.
![]()
Note: Your organization may have pre-configured several drive letters each with unique views into Access Anywhere. For more information see Cloud Drive Packaging.
Drive Uploader
After files are created or changed the drive sends the file to Access Anywhere. A separate process, the Drive Uploader, coordinates the uploading of files and folders to maximize network bandwidth, but also to allow the local application (and user) to continue work.
Exclusion/Temporary Files
Files that start with ~ (tilde) and files that match the exclusion list are not uploaded unless those files already exist on the backend storage.
Temporary and backup with .ac$ and .bak extensions are also excluded.
User Guide
Drive Letter
The drive can be accessed using the assigned drive letter through applications and command scripts.
To see a UNC style path use the command
net use
Note that the drive is only accessible by the user running the application and, (unless configured to run as a service) will only be started when the user logs into the desktop.
Taskbar Icon
Open the drive in the File Explorer by clicking on the NAA icon in the task bar.
![]()
The app icon will be greyed out if the drive is not started.
Menu
Access the Cloud Drive menu by right-clicking on the taskbar icon.
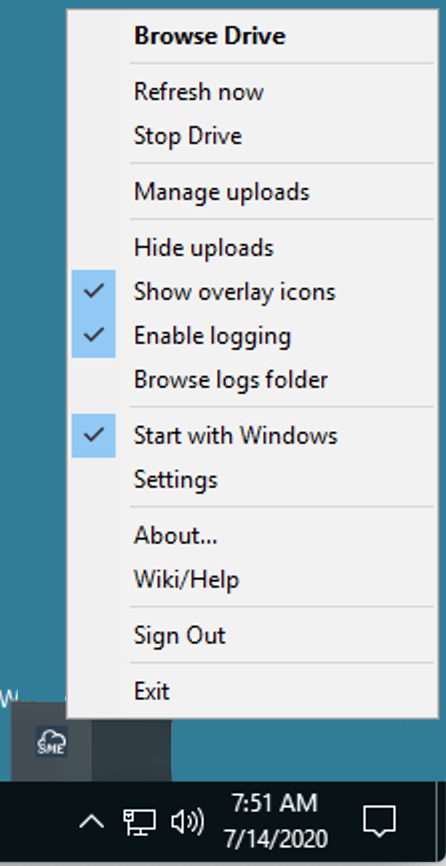
- Browse Drive - Opens Windows File Explorer
- Refresh now - Forces the drive to refresh folder listings
- Stop Drive - Stops the drive letter but not the app
- Manage uploads - Opens Uploader window permanently
- Hide uploads - Don't show Uploader window during uploads
- Show overlay icons - Indicates if cache status is shown on File Explorer icons
- Enable logging - Logs drive activity for troubleshooting.
- Browser logs folder - Opens logs folder in File Explorer
- Start with Windows - Start the drive automatically
- Settings - Opens settings window
- About… - Shows version, terms of use and privacy policy
- Wiki/Help - opens this doc site
- Sign Out - Stops the drive and logs out of Access Anywhere
- Exit - Stops the app (doesn't log out of Access Anywhere) ### Settings
Access Cloud Drive Settings via the right-click menu from the taskbar icon.
- Sign Out - Change Access Anywhere endpoint or credentials
- Edit Drive - right-click on Cloud Drive (S:) to change the drive letter or label (default is S: and Cloud Drive). Additional letters can be added through the packager.
- Refresh folders contents - Click on X minutes to set the cache duration for folder listings to a value between 30 seconds and 8 hours.
This setting applies when a user navigates to a folder in the Cloud Drive. If the Cloud Drive has a listing of the contents of the folder that is more recent than the configured ruration it displays that listing. If it does not, it requests a fresh listing from Access Anywhere.
When Cloud Drive version 22.05.25 or later and Access Anywhere v2106.06 or later are used together with a provider for which real-time cloud refresh is active, a request by the Cloud Drive to Access Anywhere for a fresh directory listing causes the following to happen:
- Access Anywhere immediately sends the Cloud Drive the most recent listing information that Access Anywhere already has.
- The Cloud Drive displays this listing immediately.
- Access Anywhere fetches an updated listing from the storage.
- When the updated listing is available, the Cloud Drive retrieves it from Access Anywhere and displays it.
- Always show icons, never thumbnails - Enable this option so that Windows Explorer doesn't download media, documents and other files just to display a thumbnail image.
- Don't display contents in folder tips - Enable this option so that Windows Explorer doesn't download subfolder listings in order to show hover tips.
- Exclusion list - Enable this option to change the temporary files the drive ignores by default.
- Delete files cached for more than X hours - If enabled remove files in local cache after a configurable number of hours.
- Delete cached files larger than X MB after upload - If enabled remove files larger than configured size from local cache after uploading.
- Delete cached files when Windows shuts down - Clears cache on reboot.
- File cache folder - Change the location of the local cache. Network locations are not supported.
- Clear - Clears files in the cache that have not been uploaded.
- Browse - Opens the cache location in File Explorer.
Bandwidth Settings
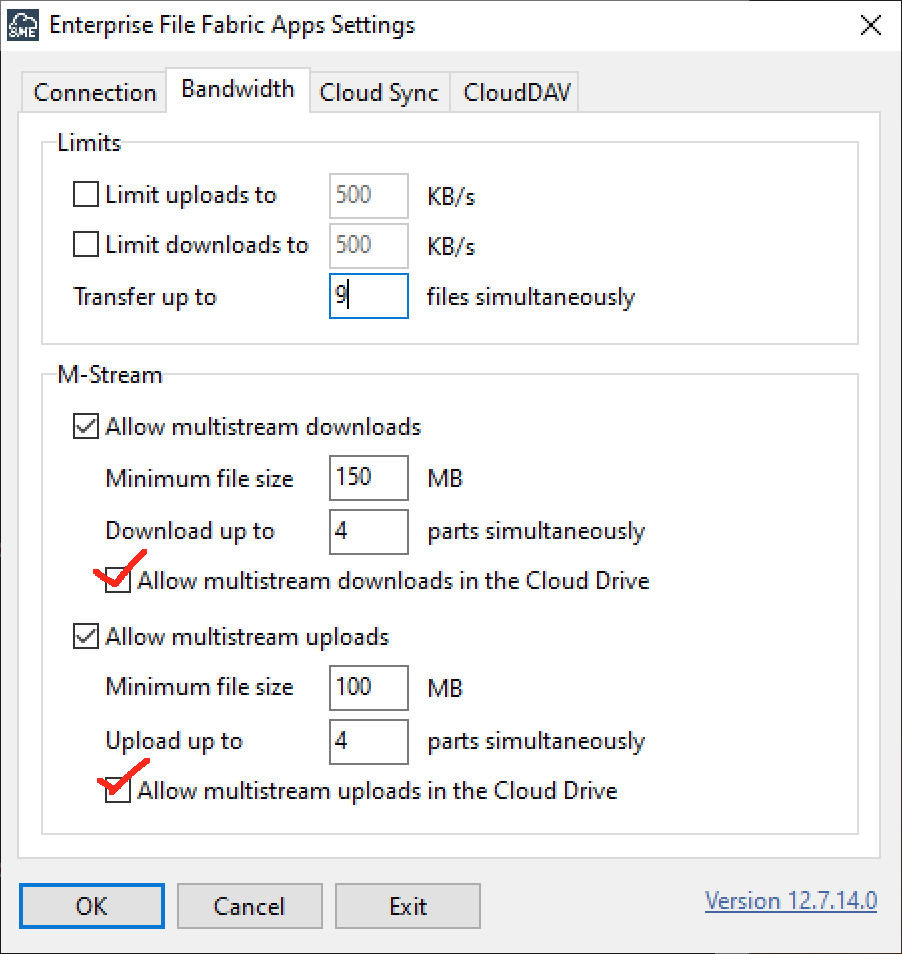
There are a few Nasuni Access Anywhere Apps Settings that are used by the Cloud Drive including the Connection and Bandwidth settings.
Access Settings via the right-click menu from the Nasuni Access Anywhere Apps taskbar icon and select Bandwidth.
- Transfer up to - Number of simultaneous uploads for the Drive Uploader
To use M-Stream with the Cloud Drive you'll need to explicitly allow multistream uploads and downloads.
Cloud Actions
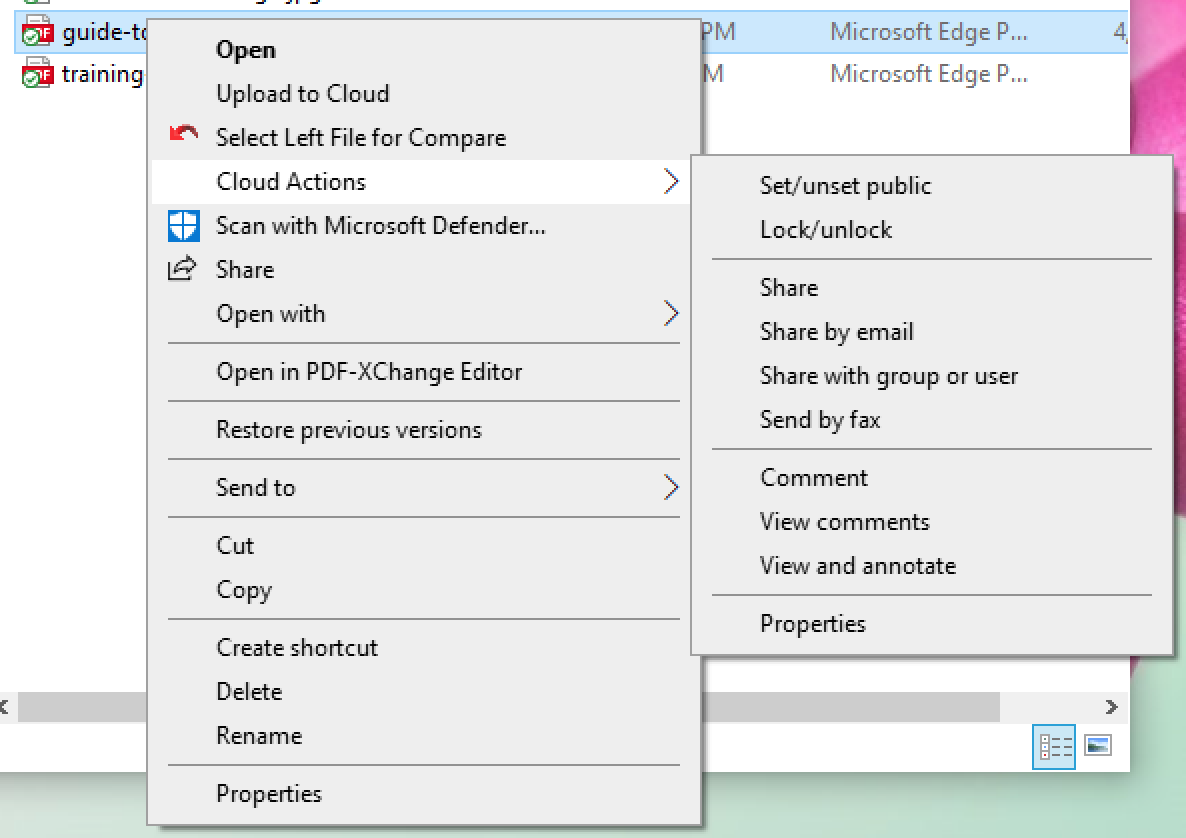
Through the Windows File Explorer users can 'right click' folders and files access to 'Cloud File Actions'.
The following actions may be available depending on the type of file:
- Set/Unset public - Asks if the the file should be made public
- Lock/Unlock the file - Asks if a the file should be locked or unlocked
- Share - Creates a share link. User can set short links, expiration date and count, and password as per organizational share policies.
- Share by email - Creates and sends a share link via email.
- Share with group or user - Share file with business group.
- Send by fax - Send file via Interfax.
- Comment - Add comment to file
- View comments - View comments for file
- View and annotate - Annotate PDF file
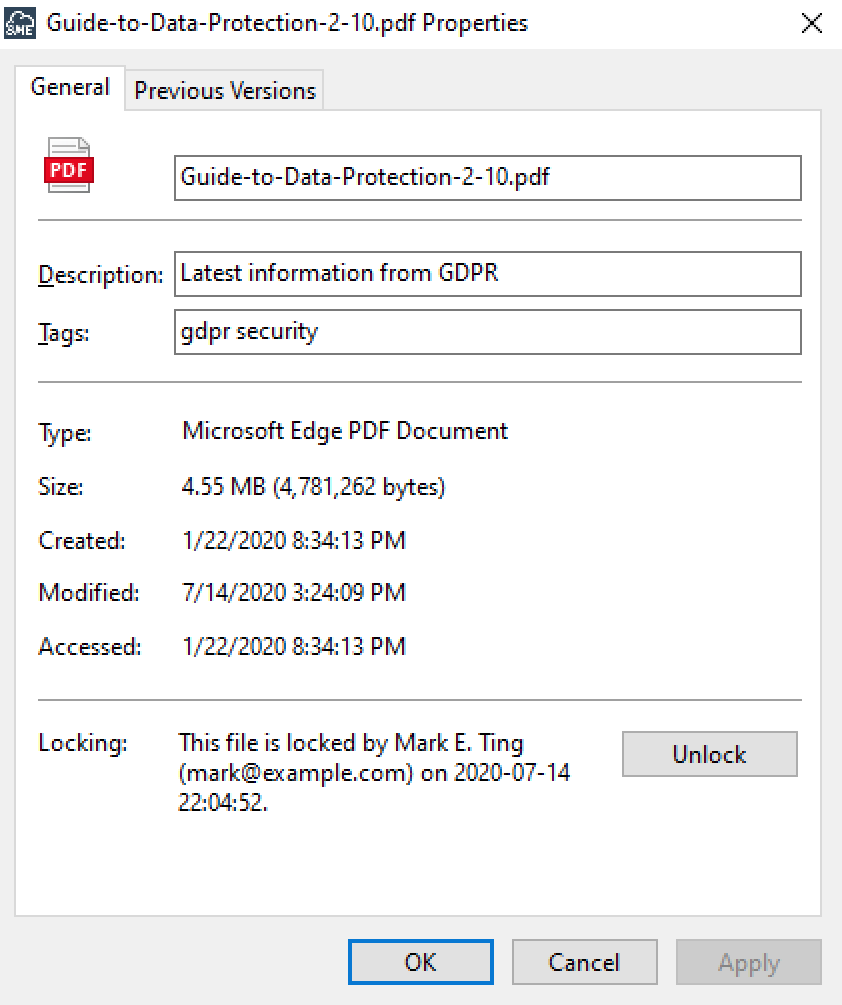
- Properties - Cloud properties for a file or folder, showing description, tags, modified times and lock information:
Cloud Search
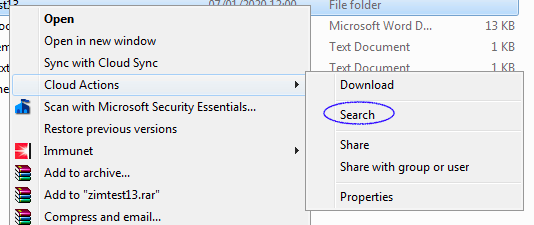
Cloud Search finds files with names that match a search string provided by the user. Cloud Search is available from the right-click context menu for every folder:
Regardless of the folder that is highlighted when the option is selected, the search operates across all of the directories in all of the providers to which the user has access through the Cloud Drive.
To search the Cloud Drive, select the Search menu option to expose the Cloud Search window:
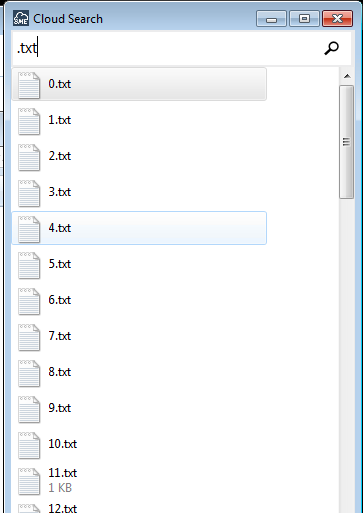
Then enter at least three characters into the search box and click on the magnifying glass symbol or press Return. Files with names that contain the character string you entered will be listed in the Search Window:
Double clicking on a found file opens it in the editor that is associated with it (if there is one).
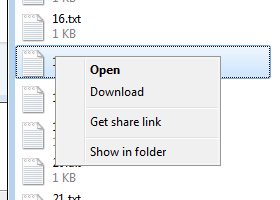
Right-clicking on any of the found files opens a context menu that provides additional actions you can take on the file:
Download
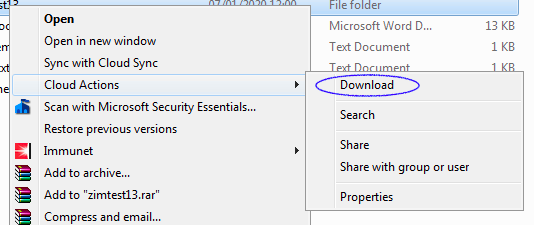
The Download feature downloads the contents of the selected directory to the folder of your choice. Download is available from the right-click context menu for every folder:
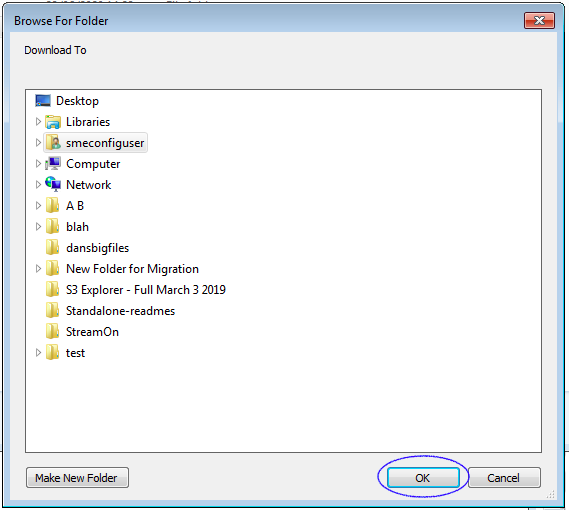
After highlighting the folder and clicking on the menu option, choose the destination folder for the download from the Browse for Folder window and click on Ok:
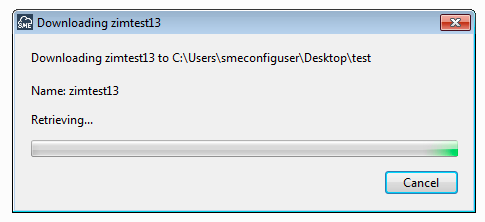
The Downloading window will appear and show the progress of the download:
Embedded External File References
Many applications, for example: AutoCAD, Word and Excel, allow references to other files to be embedded in their respective document file types. Where these paths are relative to the main document, they will often but not always be found and loaded successfully when the main document is opened in its editor (e.g. AutoCAD for .dxf files) from the Cloud Drive. Absolute paths can also work in some circumstances, but some configuration may be required to achieve this. For help with specific cases please contact Support. Note that the only solution in some cases may be to update the internal references to the external files.

