Windows Desktop
Last updated on May 23, 2024.
Download Nasuni Access Anywhere for Windows and the Packager from your Nasuni account.
Note that the Windows applications are not compatible with Windows running on ARM processors.
See also :
For applications see:
9 Accessing the Cloud Drive
The Cloud Drive is assigned an actual drive letter and can be used from DOS as well as the Windows File Explorer. Clicking on the Computer tab from the windows explorer gives gives access to the drive or you can just select whatever drive letter you assigned from the file tree.
Any MS Office / Libre Office files that are opened from the drive are auto-locked on open and unlocked on exit.
Tip: Create a shortcut of the drive on your desktop
Note that empty files created in the Cloud Drive will not be uploaded to the Access Anywhere server and to the underlying storage system that contains the folder in which they were created. In particular, note that some Office file types such as .docx and .pptx are created as empty files from the Windows Explorer context (right click) menu. These files won't be uploaded until they have been opened for editing and then saved.
10 Cloud Drive: Options
You can choose to monitor and manage the Cloud Drive from a small utility that sits in the windows taskbar. When a file is accessed from the Cloud Drive it sits in the cache on your PC. The next time you access the files it will be used from the cache.
You can also set how often the file should stay in the cache before the next time it is opened from the cloud (ie. 3 minutes, 5 minutes etc)
The Virtual Disk Activity can you show visually how files are being transferred /uploaded and their status.
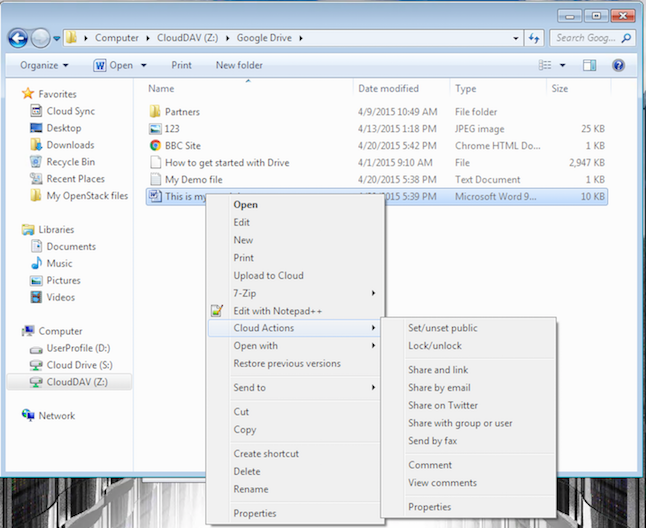
11 Cloud Drive: Right click options
In windows file explorer users can 'right click' the network cloud drive and get access to 'Cloud File Actions'. These are specifically:
- Set/Unset the file to be public
- Lock/Unlock the file
- Get a unique URL for a file
- Add a file comment
- View file comments
- Check the Cloud properties of the file
12 WebDAV Cloud Drive
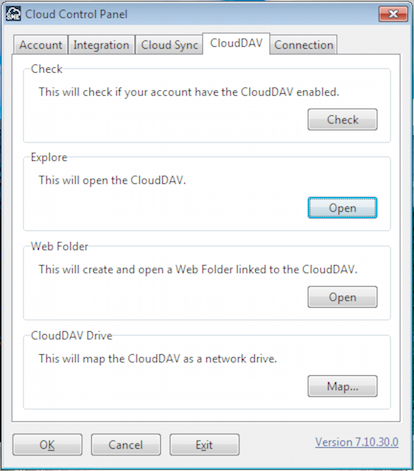
The CloudDAV Drive can only be turned on if CloudDAV is enabled for your Account. You can check if it is from the CloudDAV tab within the Control Panel.
If it users can map CloudDAV to a virtual drive. CloudDAV is actually a universal WebDAV layer that we add over all clouds mapped to your account. Windows supports using WebDAV as a drive. We make this easy by just clicking the 'Map' button. This will present you with the ability to choose which drive letter to map the drive to.
13 WebDAV Cloud Drive: Right Click Options
From the windows file explorer you can right click the network cloud drive and get access to Cloud file actions. These are specifically:
- Set/Unset the file to be public
- Lock/Unlock the file
- Get a unique URL for the file
- Add a file comment
- View file comments
- Check the Cloud properties of the file
14 Updating /installing Libre Office add-in
You can install or change the version of the Libre Office add-in directly from the Control Panel->Desktop Integration tab.
15 Libre Office Cloud ToolBar
You can choose to install the Libre Office Cloud toolbar. This installs two cloud toolbar icons in Libre Office which enables you to open files directly form a Cloud, such as Google Drive, and then save files edited files directly to a Cloud.
Files are automatically locked and unlocked on Open and Save.
16 Microsoft Office Cloud Toolbar
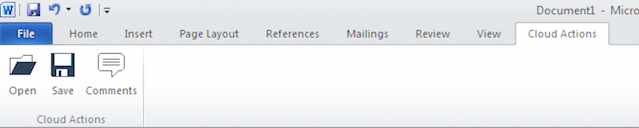
You can choose to install the Microsoft Office Cloud toolbar. This installs three cloud toolbar icons in MS Office which enables users to open files directly from a Cloud, such as Google Drive, S3, or OpenStack, and edit and save files directly to a Cloud.
File are locked and unlocked on Open and Save.
The comments feature enables you to make comments directly on files as you are creating them or editing them in MS Office Apps.
17 Microsoft Windows Taskbar
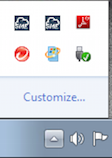
When launched the Cloud DashBoard and Virtual Drive reside in the Windows TaskBar on the right hand side of the screen for quick launch or for accessing settings.
18 The Cloud Dashboard
The Cloud Dashboard is your entry point into many of the features and services. It serves as a mechanism to get to some of the Admin functions that would otherwise only be available from the Web as well as an entry point into the Cloud Explorer application.
31 Cloud DashBoard: Business Groups
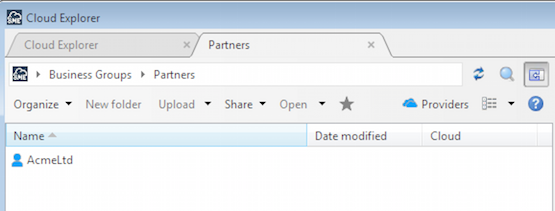
You can manage Business Collaboration Groups directly from the Cloud DashBoard. You can create new groups and add members to groups. Business Collaboration Groups are explained in the "Sharing a file with a Business Group" section.
32 Cloud DashBoard: Importing Contacts
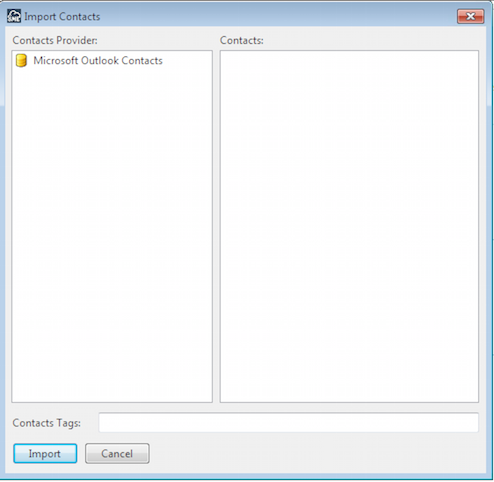
You can choose the import contacts option from the 'Cloud DashBoard' to import contacts from desktop Outlook. Any contacts imported are checked for duplicates and available from within the Cloud file system. They are saved in VCard format.
33 Cloud DashBoard: Message Centre
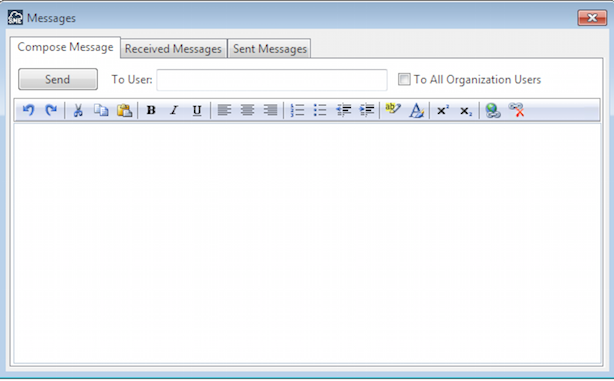
You can send and receive message directly to your account using the built in messaging system. This of course makes more sense if you are part of a business Organization Cloud, but is still useful for administrators to contact you re any system or cloud issues.
35 Sync Centre

The Sync Centre is a sophisticated Desktop/Cloud synchronization tool. It enables users to keep multiple local folders in sync with multiple Cloud Storage endpoints.
The Sync Centre can be launched from All Programs->NAA Cloud Tools->Sync Centre or directly from the The Cloud DashBoard. You may have configured the sync on install of the NAA tools but if you did not on first launch you can go about setting up a new sync pair.
When syncing, Sync options are:
Sync All: Ensure all files/folders on desktop are the same as all/files and folder on Cloud and vice-versa
Sync Up: Only Sync files/folders from the desktop that do not exist on the Cloud. Ignore any files/folders on the cloud that do not exist on the desktop
Sync Down: Only Sync files/folders from the Cloud that do not exist on the desktop. Ignore any files/folders on the desktop that do not exist on the Cloud.
Clone Down: Create an exact replica of files/folders on the Cloud, on the desktop and delete any files/folders on the desktop within the sync directory structure that do not exists on the cloud.
Clone Up: Create an exact replica of files/folders on the desktop, on he Cloud, and delete any files/folders on the Cloud within the sync directory structure that do not exist on the desktop.
You should always be careful about using Clone Up and Clone down as files can be deleted as an exact clone of either the desktop or the Cloud is created with all files that exist but don't match being deleted.
Sync Centre Options
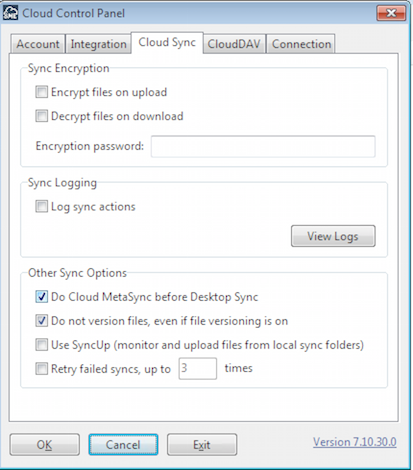
You can access the Sync Centre options from the Control Panel. The options enable you to:
- Encrypt / Decrypt files to / from the Cloud
- Choose how many times a failed upload is retried.
Clicking the 'Schedule' button enables you to set Sync schedules/
If an issue is encountered with the sync centre one of the things support will ask for is the log files and there is an option in the Sync settings to turn logging on.
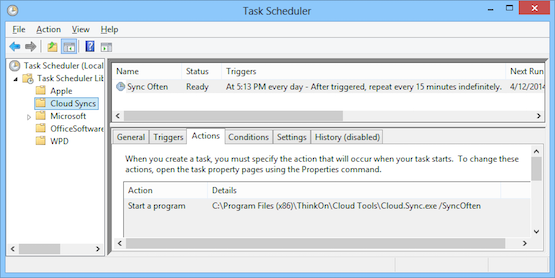
Sync Centre Scheduling
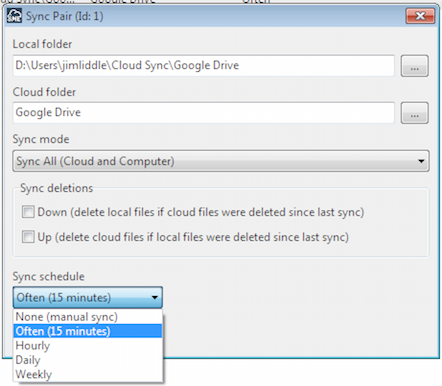
Each Sync pair can be setup with a one of the pre-defined sync schedule options. If more fine grained control on the sync schedule is required then this can done by using the underlying Windows Task scheduler which is what the NAA sync centre is using to schedule its syncs.
To run the Task scheduler simply type "scheduler' in the search programs and files dialog