Creating an Organization
An organization is an administrative unit for a set of users. It includes policies, storage resources, and permissions for those users. A single instance of an appliance can host multiple organizations. Once created, organizations, also called tenants, are self-managed by their users and not accessible or visible from other organizations on the same appliance. An appliance administrator creates organizations and provides credentials for the first Organization Administrator, who must log in to complete the setup of organization policies and users.
This guide describes creating the following procedures. - Creating an organization - Adding storage - Adding Users - Defining organizational policies
Creating an Organization
The following section describes the package review, creating the organization, and deleting sample accounts.
Package Review
A package is a configurable set of features and settings. For multi-tenant appliances, numerous organizations can be associated with the same package. This will assist administrators with maintenance and provide standardization. The first step to creating an organization is package review and, if required, configuration.
To view and modify a package configuration, follow these steps.
- Log in as the Appliance Admin.
- Navigate to the hamburger menu and select User packages. 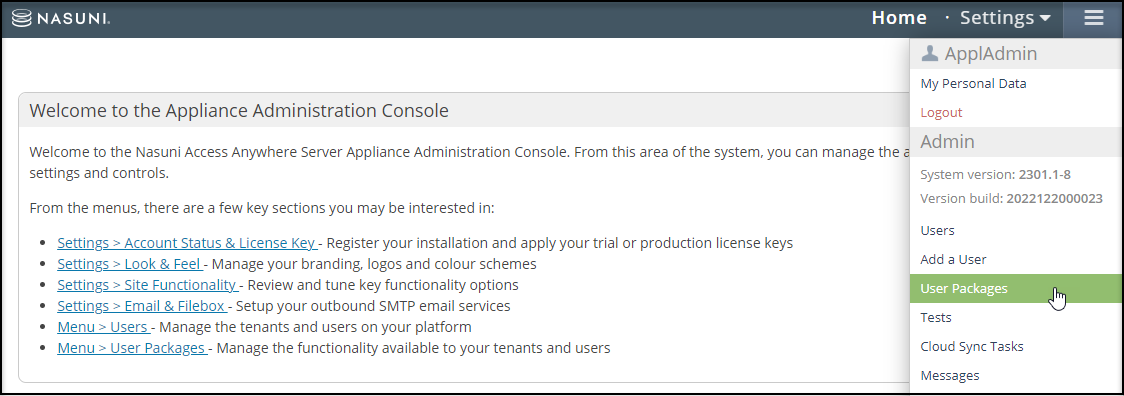 - The list of available packages displays on the screen. Choose a package and click the pencil icon to review the package configuration.
- To review the package configuration, click the category on the left side. The options display on the right side. If modifications are required, use the corresponding toggle switches and fields to modify the configuration.
- The list of available packages displays on the screen. Choose a package and click the pencil icon to review the package configuration.
- To review the package configuration, click the category on the left side. The options display on the right side. If modifications are required, use the corresponding toggle switches and fields to modify the configuration. 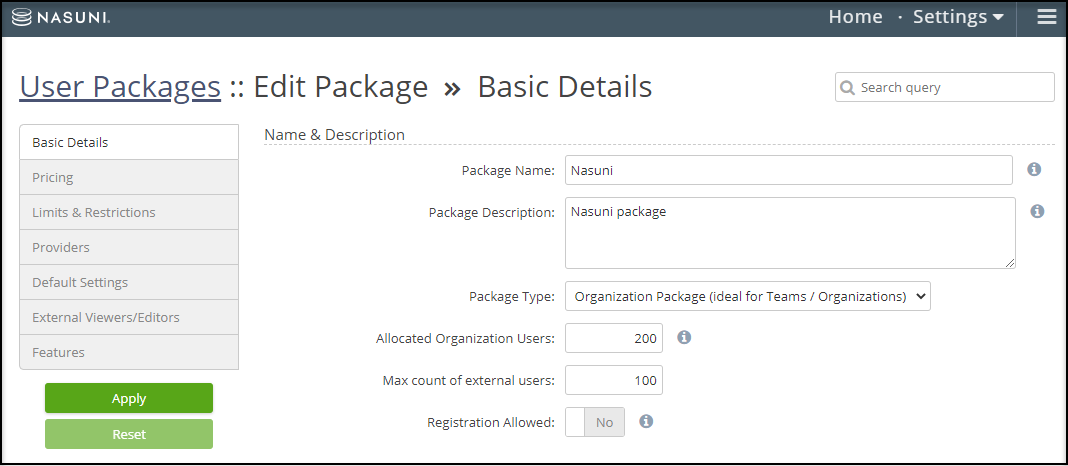 - Click Apply to save your changes. If no changes were made, navigate to the hamburger menu, select Users, and proceed to Creating an Admin User.
Create an Admin User
After choosing a package, create an admin user to manage the organization. This user is specific to the organization and is created using your appliance admin account.
To create an admin user, follow these steps.
- Log in as an Appliance Admin.
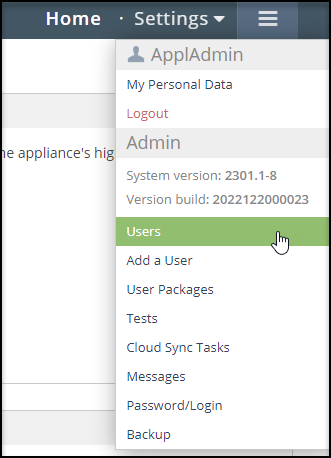
- Navigate to the hamburger menu and select Users.
- Click Add a User.
- Use the following fields to enter the organization admin user information. This will also be your organization.
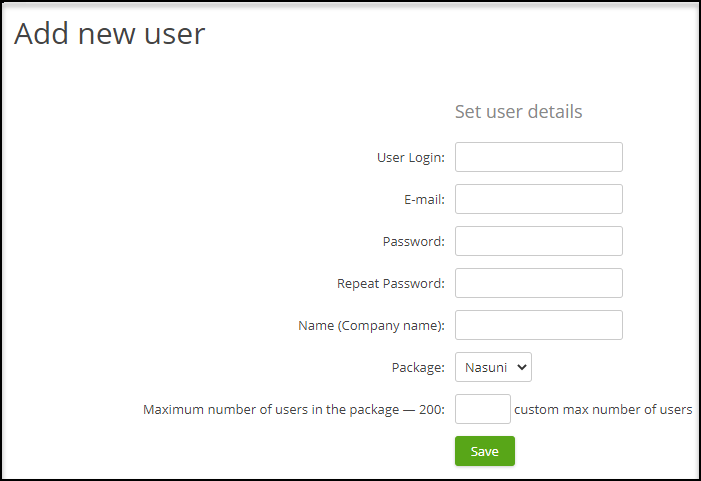 User Login: The Organization’s short name and super user's username. We recommend the domain name of your company. For example, nasuni.com. E-mail: The email address of the organization admin must be unique to the system. Password: Enter a unique password. Name (Company Name): Full organization name. Package: Choose the user package template from earlier. Users in the package: Leave blank or specify a number 200 or less
 - Click Save to finish.
Add Storage
Log out of the Appliance Administrator account and log back in as the organization admin user you created. The Add Storage Provider screen appears. Select a provider from the options, and follow the instructions provided on the pop-ups.
Adding Users
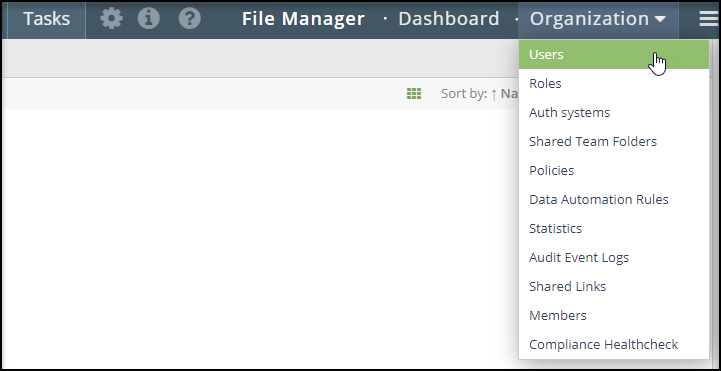
Users are managed at the organizational level. To review current users or create additional users in the system, navigate to the hamburger menu and click Users.
Users can be authenticated against an internal user database or an identity management service. Out-of-the-box support is provided for Active Directory and SAML.
Organization member users have full access to product features including search,
To implement additional integration requirements, reach out to Nasuni Professional Services. For more information, see Identity and Access Management or Adding / Managing Users.
Organization Policy Settings
This section describes default configurations and best practices for the organizational settings. Your specific configuration may differ due to your organization’s policies.
To get started, follow these steps.
1. Log out from the Appliance Admin, and log back in as the user you just created.
- If you have not already selected a storage option, the Add Storage Provider screen displays. Select your provider and follow the corresponding instructions. Do not use a storage location with existing production data for the initial trial.
- After adding your storage, navigate to the Organization tab and select Policies.
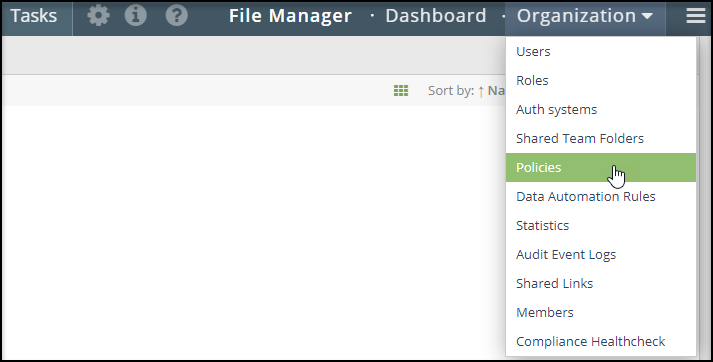
- Use the Organization Policies page to configure your Access Anywhere settings. The following sections describe each section in more detail.
- After adding your storage, navigate to the Organization tab and select Policies.
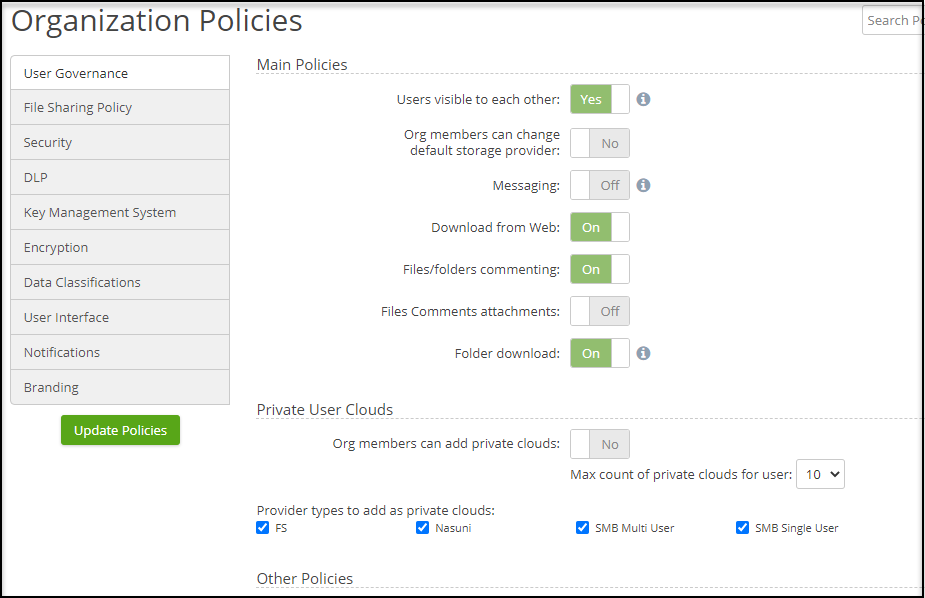
User Governance
This section of settings specifies the types of interactions users can have with other users, their files and folders, and if a private cloud can be enabled.
Enabling the private user cloud allows a per-user Admin managed home folder and for users to add a personal drop box or google drive into the file manager.
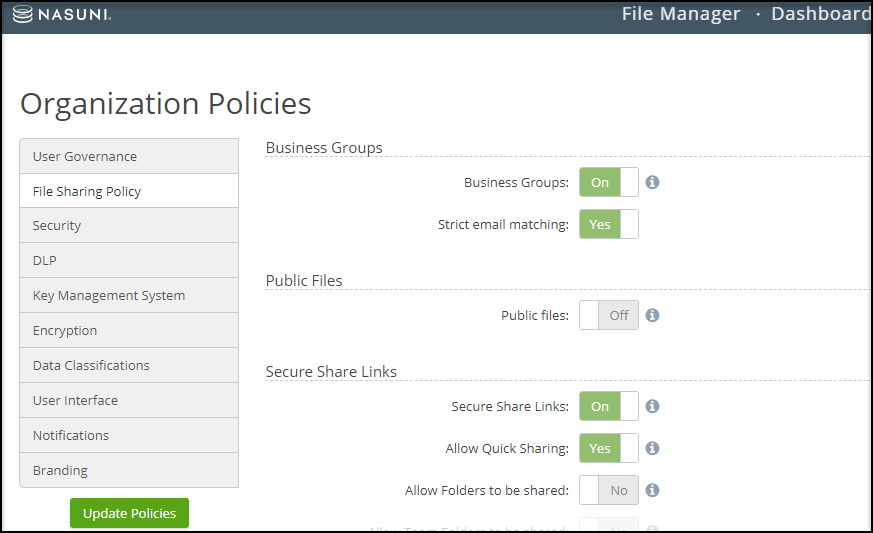
File Sharing Policy
The File Sharing Policy area allows you to create rules that enforce whom files are shared with, the available security options for secure share links, and which external collaboration platforms are permitted.
To edit these configurations, click the File Sharing Policy tab and use the corresponding toggle switches on the right side.
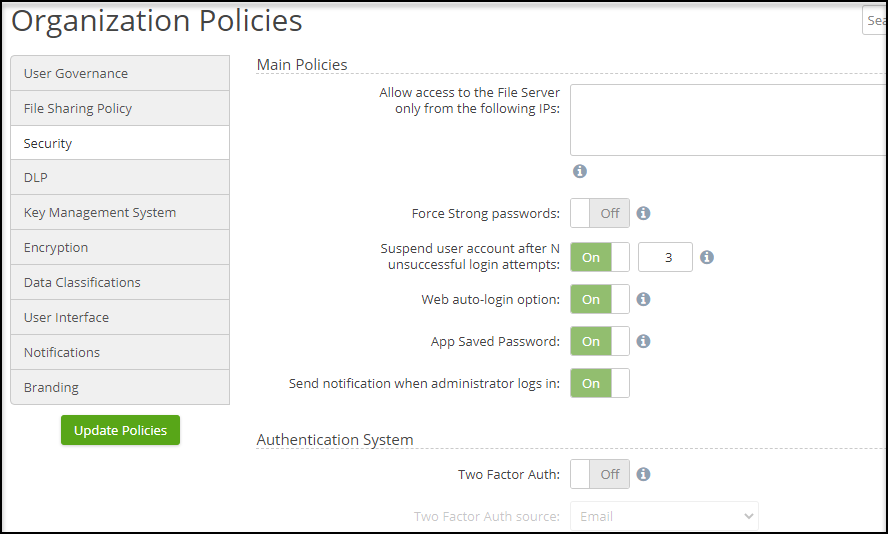
Security
Defining File Server access from specific IPs, user password options, two-factor authentication, and event log options are found in the Security tab.
DLP
The DLP tab provides customizable watermarking to documents. Click this tab to adjust the watermarking font size, text, or options.

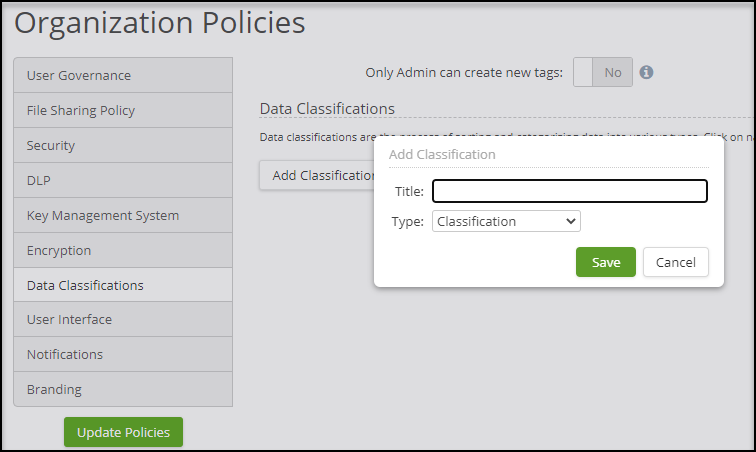
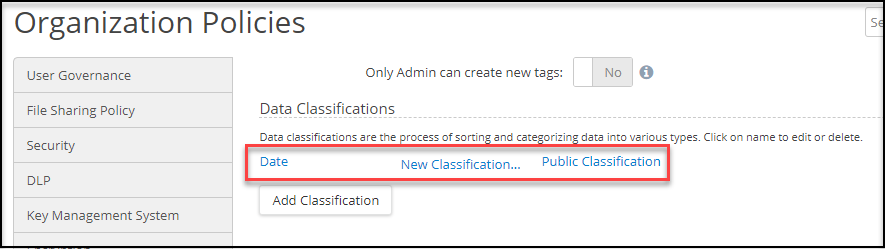
Data Classifications
The Data Classifications tab is where data classifications are created and managed.
To create a new classification, click Add Classification. Enter a Title, choose a type, and click Save.
 To edit or delete a classification, click the hyperlinked classification, and use the pop-up box to edit or delete.
User Interface
Use the User Interface tab to choose which tabs and functionality users can access. Scroll down the page to edit workspace titles, sorting, and choose folder paths.
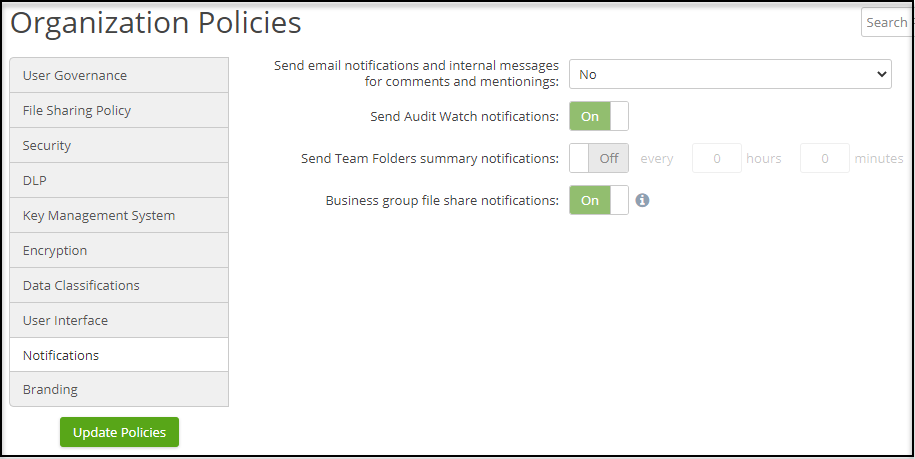
Notifications
Use the Notifications tab to set up email notifications for comments and mentions, folder summary notifications, or file shares.
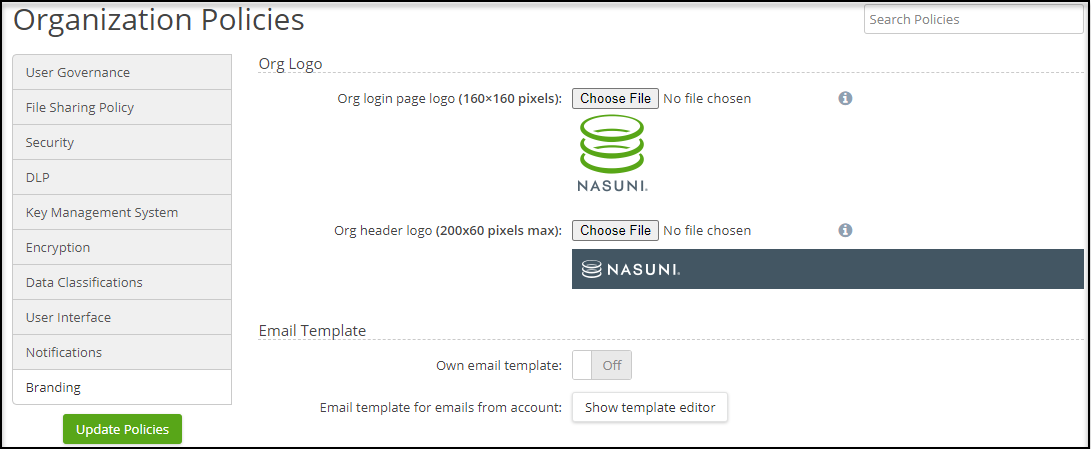
Branding
The Branding tab allows you to change the logo, header, and email template for your Organization. For information on branding the appliance, including the login page, see Branding.